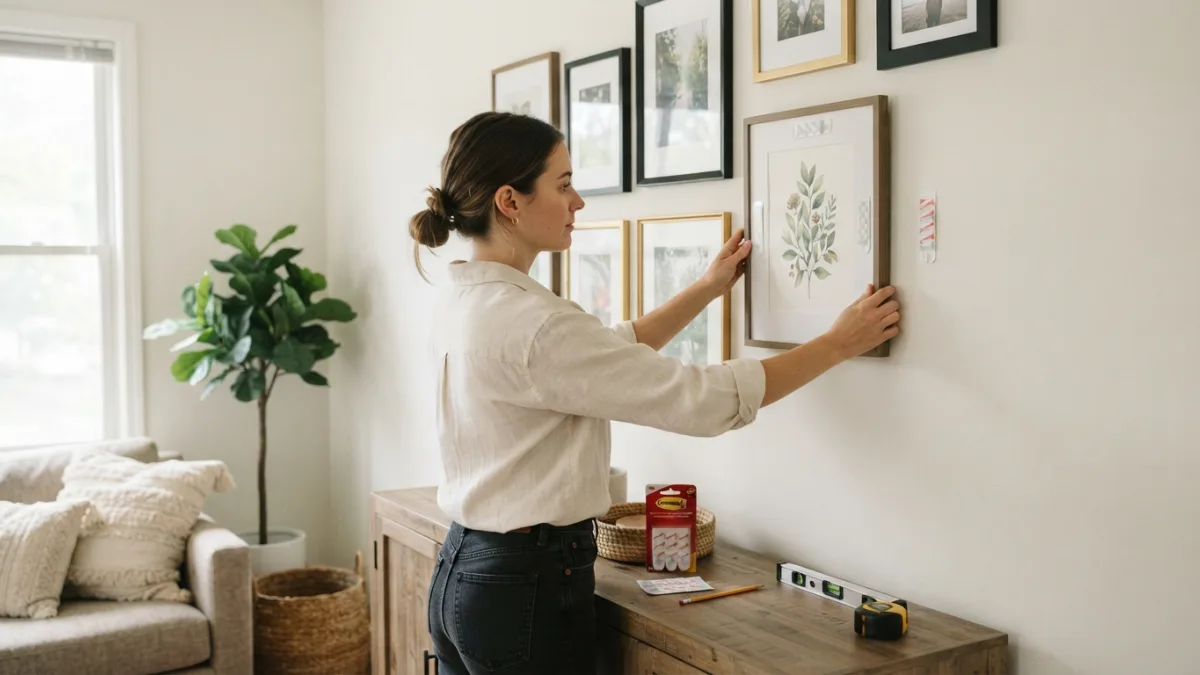
Gallery Wall Without Nails: 7 Easy Steps for Renters
A bare wall can feel like a missed chance, especially when your lease bans drilling. Here’s the good news: you can still build a gallery wall without nails and get the full layered, personal look. No hammer, no wall anchors, no tense email to your landlord. You just need a plan, a few smart products, and a little patience. This guide shows you how to choose a layout, test it on the wall, hang each piece, and take everything down later without damage. Whether you live in a studio or share a flat, these steps work best on smooth, painted walls. First, let’s look at why this approach makes sense.
Why Renters Love This Approach
Renter friendly wall decor matters because most leases limit what you can do to the walls. Even small nail holes can lead to patching, repainting, or a deduction from your deposit, depending on your rental agreement. Check your lease before you start, since rules differ from place to place. A no-damage display also gives you freedom. You can swap prints when your taste changes, move frames around, and take the whole collection with you when you leave. Companies such as 3M, which makes Command products, built whole product lines around this need. Still, no adhesive works on every surface. Textured walls, wallpaper, and flaking paint can cause trouble, so test first and read the instructions on every package. If you want to dig deeper, our guide on Removable Wallpaper: 7 Easy Steps to Avoid Mistakes covers this in more detail.
Your Step-by-Step Plan for a Gallery Wall Without Nails
Step 1: Explore Gallery Wall Layout Ideas
Gallery wall layout ideas fall into a few simple families, and picking one early saves you from endless rearranging. Start with your largest or favorite piece and treat it as the anchor. Then build around it, keeping the gaps between frames fairly even. Many people leave about 5 to 8 centimeters (2 to 3 inches) between frames, though your own eye should decide. Think about the wall itself, too. Hang the group near eye level, and center it over a sofa, bed, or desk so it feels connected to the room. Here are four layouts that work well for beginners:
- Grid: Same-size frames in neat rows and columns. Clean and calm.
- Salon style: Mixed sizes clustered around one anchor. Lively and personal.
- Single line: Frames in one row. Great above a bed or a long table.
- Staircase: Frames that step up or down along the stairs.
Step 2: Build a Paper Template Frame Arrangement
A paper template frame arrangement lets you test your design before anything touches the wall. Trace each frame onto kraft paper, wrapping paper, or old newspaper, then cut out the shapes. Write the name or number of each frame on its paper twin. Next, stick the templates to the wall with masking tape, which usually peels off cleanly from painted surfaces. Step back, squint, and move shapes until the group feels balanced. This is the cheap and easy moment to change your mind. Once you like the look, mark the top corners or the hanging points of each template, and you have a map to follow. You can also lay the paper shapes on the floor first, if wall space feels awkward.
Step 3: Use Adhesive Picture Hanging Strips the Right Way
Adhesive picture hanging strips are the workhorse of any gallery wall without nails, but they only work if you apply them with care. Wipe the wall with a clean, dry cloth to remove dust and grease, and let the surface dry fully. Then check the weight rating on the package and choose strips that match your frame, with room to spare. Press each strip firmly for the time the manufacturer recommends, and follow any waiting period before you hang the frame. Use the number of strips the package suggests for the size of your frame, and keep them level. Always check the instructions for your exact product, because ratings and steps vary between brands and strip types. This connects closely with another common issue — see Renter Friendly Lighting Ideas: 7 Easy No-Wiring Tips for more on that.
Step 4: Add Removable Wall Hooks for Lighter Pieces
Removable wall hooks suit lighter items such as small frames, canvas prints, woven pieces, or a string of postcards on twine. Pick hooks with a rating well above the weight of the item, then stick them to a clean wall just like the strips. They give you flexibility, because you can slip a frame on and off without touching the adhesive again. That helps when you like to swap prints with the seasons. Check how your frame hangs, too. A frame with a sawtooth bracket or wire usually needs a hook that matches the shape. If the pairing looks shaky, switch to strips or another method. Hooks also work well for small decorative objects that break up a wall of rectangles.
Step 5: Mix in Picture Ledge Shelves
Picture ledge shelves add depth to your display and make changes easy, because frames simply rest on them. The catch is that many ledges need screws. For a gallery wall without nails, look for a lightweight ledge made for adhesive mounting, and follow its weight limit closely. Another option is a long console, dresser, or bookshelf where you lean frames at the base of your wall arrangement. Layer smaller frames in front of larger ones, and add a plant or a small object for variety. Leaning frames also lets you rearrange in seconds. Keep heavy glass frames away from the edge of any shelf, and avoid spots where people walk by often or where a door might bump them.
Step 6: Hanging Heavy Frames Safely
Hanging heavy frames safely takes more caution than any other step, and sometimes the right answer is not to hang them at all. Never trust adhesive beyond its stated rating, and remember that big frames with glass can weigh more than they look. Weigh the frame if you can. Where the frame allows, swapping glass for lightweight acrylic cuts the load. Place heavier pieces lower on the wall, so a fall has a shorter drop. Think about what sits underneath, too, and avoid putting heavy art above a bed or a crib. For very large mirrors or thick, solid frames, lean them on the floor against the wall, or ask your landlord about approved mounting options. A picture frame with a heavy wooden body can easily outweigh a strip’s limit. You might also find our article on Hang Curtains Without Drilling: 7 Easy No-Damage Tips helpful here.
Step 7: Remove Adhesive Strips Safely Before You Move Out
To remove adhesive strips safely, go slowly, because rushing is how paint peels. Grab the tab and pull it straight down, parallel to the wall, stretching the strip a long way until it lets go. Pulling outward toward you can tear the paint or the wall surface. If a strip resists, warm it briefly with a hairdryer on a low setting to soften the adhesive, then try again. Clean any sticky leftovers with a soft cloth and a little mild soap and water. Test any cleaner on a hidden patch first. Take down your frames one at a time, working from the top, and snap a photo of the arrangement so you can recreate it in your next home. Good care here helps protect your deposit.
Make Your Gallery Wall Last
A gallery wall without nails is not a compromise. It is a flexible, low-risk way to turn a plain rental into a space that feels like yours. Plan the layout, test it with paper, use the right strips, hooks, or ledges, and respect every weight limit. Then check your frames every few weeks, especially in hot, humid, or sunny rooms where adhesives can behave differently. If a piece starts to slip, take it down and fix it before it falls. Keep a few spare strips on hand, add new pieces over time, and let the wall grow with you. When moving day comes, you will take your art and leave the walls looking just as you found them.
FAQ: Gallery Wall Without Nails
Can you really make a gallery wall without nails?
Yes. Adhesive strips, removable hooks, adhesive-mounted ledges, and leaning frames on furniture all let you build a full display without drilling or hammering. Results depend on your wall surface and the weight of your frames, so always check the product instructions. For a related walkthrough, check out 10 Renter-Friendly Upgrades That Won't Cost Your Deposit.
How much weight can adhesive strips hold?
It depends on the brand, the size, and the number of strips you use. Each package lists a weight limit, so choose strips rated above your frame’s weight and follow the instructions exactly. If you are unsure, use a lighter frame or another hanging method.
Will adhesive strips damage my paint?
They can, especially on fresh paint, weak paint, or wallpaper. Test a small, hidden spot first. When you take them down, pull the tab slowly and straight down along the wall instead of outward.
What is the easiest layout for beginners?
A grid or a single row is the simplest, because identical spacing makes the arrangement look tidy even with basic frames. Cut paper templates, tape them up, and adjust until you like the result before you stick anything to the wall.
What should I do if a frame is too heavy?
Do not risk it. Lean the frame on a console or on the floor against the wall, or ask your landlord what mounting is allowed. Swapping glass for acrylic, where possible, can also reduce the weight.

Ghani Mejber — Founder & Lead Editor
Ghani Mejber is the founder of DIY Homes Hub. After years of living in compact rentals with strict lease rules and limited storage, I started sharing practical, damage-free home upgrades and basic repair guides built for real budgets. Every project I publish focuses on simple tools, accessible materials, and reversible solutions that protect your security deposit.