Rental Kitchen Cabinets: 7 Easy Ways to Cover Without Paint
Few things drag down a kitchen like dated cabinets. If you’re stuck with rental kitchen cabinets that are scratched, yellowed, or just plain ugly, you already know your lease probably rules out paint. That doesn’t mean you have to live with them. Renters have more options than most people think, and many take a weekend or less. You can add color, texture, and pattern with products that peel off, lift away, or hang in place. Some change the look of the whole door. Others focus on small details that catch the eye, like handles or open shelves. Below, you’ll find seven practical methods, plus advice on checking your lease and protecting the surfaces underneath. Pick one, or mix a few for a bigger change.
Renter Friendly Kitchen Updates Start With Your Lease
Smart renter friendly kitchen updates begin with a quick read of your lease. Look for any clause about alterations, decorations, or “permanent changes.” Many landlords accept removable products, but a short email asking for approval gives you a paper trail. Rules differ by country, state, and city, so check your local tenant guidance too. In the United States, the HUD tenant rights page is a good place to start. Before you touch anything, take clear, dated photos of every cabinet, inside and out. Then test your chosen product on a hidden spot, such as the inside of a door or the side of a cabinet near the wall. Wait a few days, peel it off, and see what happens to the finish underneath. If you want to dig deeper, our guide on Cover Ugly Rental Floors: 7 Easy Damage-Free Ideas covers this in more detail.
7 Easy Ways to Cover Rental Kitchen Cabinets Without Paint
1. Peel and Stick Vinyl for a Fresh Surface
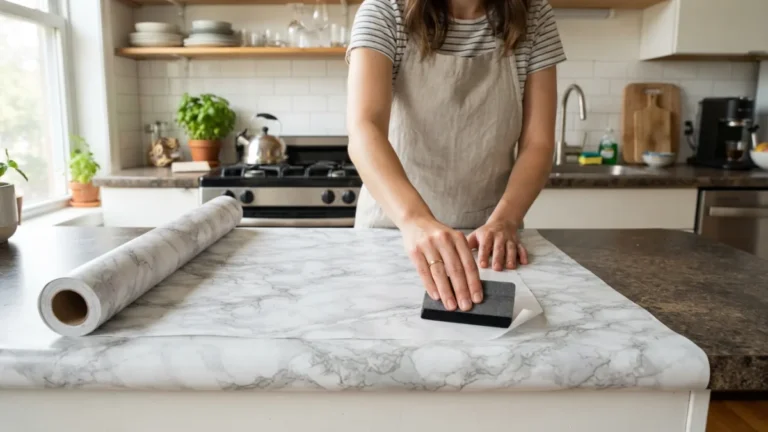
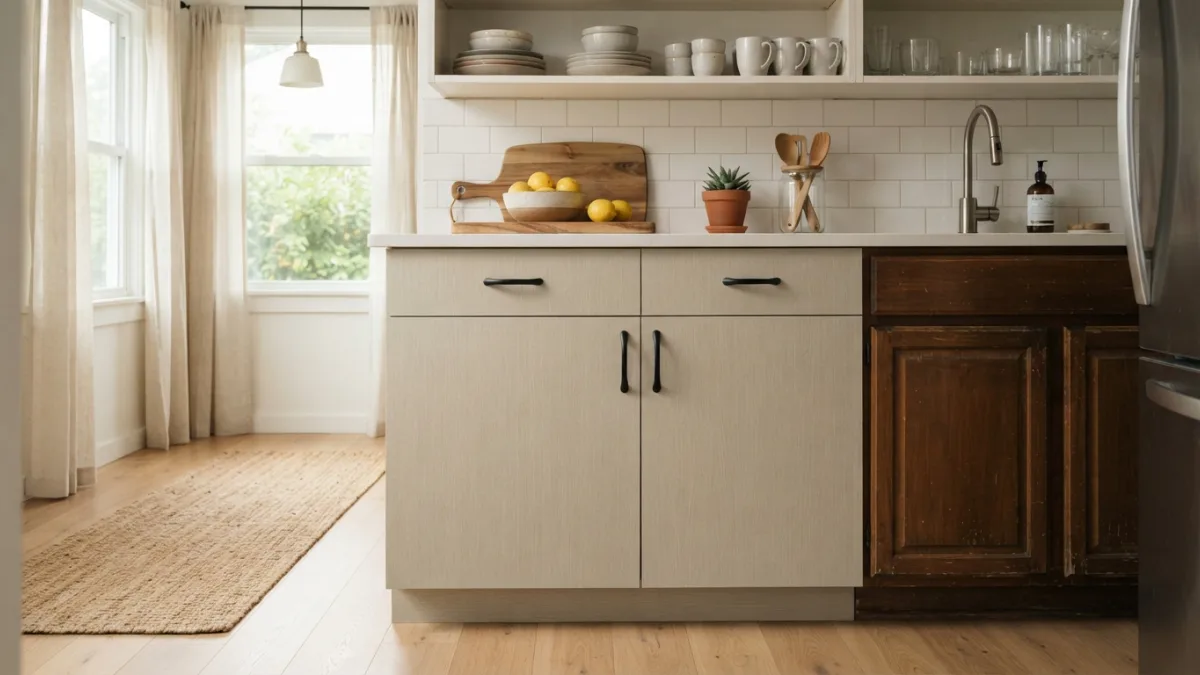
Peel and stick vinyl is the closest thing to new doors you can get without a toolbox. It comes in rolls and sheets, often in wood grain, marble, solid colors, or matte black. Thicker vinyl hides dents and old stains better than thin film does. Start by cleaning the doors with a degreaser and letting them dry fully, since grease is the main reason vinyl lifts. Measure each door, cut the vinyl slightly larger, and press it on from one edge with a squeegee or credit card. Trim the extra with a sharp craft knife. Most vinyl is made from PVC, a plastic you can read about on Wikipedia. It works best on flat doors. Heat and steam near the stove can weaken adhesive, so check the edges there first.
2. Contact Paper Cabinets on a Budget
If money is tight, contact paper cabinets are the cheapest way to change the mood of a kitchen. A roll costs far less than most vinyl products, and the pattern choices are huge. The trade-off is thickness. Thin paper shows every bump, and it can bubble if you rush. Take the doors off and work on a flat table, where gravity helps you instead of fighting you. Peel back a few inches of backing, line up the paper, and smooth it outward in slow strokes. Pop any bubble with a pin and press it flat. Wrap the edges around the door for a clean finish. When it’s time to move out, warm the paper with a hair dryer and peel it away slowly, so the adhesive comes with it.
3. Removable Cabinet Wallpaper for Pattern Lovers
Removable cabinet wallpaper suits renters who want personality, not just a clean, neutral look. Florals, stripes, and bold geometric prints can turn plain doors into a feature. Check the label for words like “removable” or “temporary,” because ordinary wallpaper can tear the finish off when it comes down. The wallpaper works best on smooth, flat doors, while heavy wood grain or carved panels may show through. Many people use it on only part of the cabinet, such as the recessed center of a shaker-style door or the back of open shelving. That approach saves money and keeps the pattern from overwhelming a small kitchen. Cut each piece with a small overlap, smooth out air with a soft tool, and keep leftover rolls in case you need repairs later. This connects closely with another common issue — see Hang Curtains Without Drilling: 7 Easy No-Damage Tips for more on that.
4. Cabinet Door Covers and Overlay Panels
Cabinet door covers sit on top of your existing doors and hide them completely. Some are thin panels sold in ready-made sizes, while others are cut from lightweight boards at a home improvement store. The best versions attach with removable mounting tape or adhesive strips, not nails or screws. That makes them a strong choice for rental kitchen cabinets with ugly grooves, chipped edges, or dated arches that vinyl can’t smooth over. A flat panel also gives you a modern, clean profile. Measure each door carefully, then decide whether the panel should cover the whole front or sit slightly inside the edge. Always read the removal instructions first. If the product can’t come off cleanly, it doesn’t belong in a rental.
5. Replace Cabinet Hardware, Then Keep the Originals
You can replace cabinet hardware in about an hour, and the change is bigger than you’d expect. Brass knobs, brushed black pulls, or simple wooden handles can make old doors look intentional. First, measure the distance between screw holes, from center to center, so the new pulls fit the existing openings. Unscrew the old pieces and store them in a labeled bag with the screws. Taped to the inside of a drawer, that bag will save you stress at move-out. If you don’t want to drill, look for adhesive-mounted pulls designed for a temporary fit. Pair new hardware with vinyl or removable wallpaper for a stronger effect, or use it alone if the cabinets are in decent shape.
6. Fabric Curtain Cabinet Doors for a Soft Look
Fabric curtain cabinet doors work well under sinks and on open lower shelves, where a cottage-style look feels natural. Remove the doors, keep the hinges and screws together, and mount a small tension rod inside the cabinet frame. Hang a lightweight curtain panel or a hemmed piece of cloth, and you’re done. No sewing machine is needed if you use iron-on hem tape. Choose a washable fabric, since kitchen splashes happen. Keep the material well away from burners and other heat sources, which is a basic safety rule for any kitchen textile. Curtains also give you easy access to pots, cleaning supplies, and small appliances. The downside is dust, so wash the fabric every few weeks. You might also find our article on Removable Wallpaper: 7 Easy Steps to Avoid Mistakes helpful here.
7. Remove the Doors and Style Open Shelves
Sometimes the easiest way to hide ugly doors is to take them off. Open shelving makes a small kitchen feel larger and shows off nice dishes, glasses, and baskets. Use a screwdriver to remove the doors, then put the hinges and screws in a labeled bag and store everything flat, ideally wrapped in a blanket to avoid scratches. Hinge marks may show on the frame, so choose upper cabinets where that’s less visible. Line the back panel with removable wallpaper or vinyl to add color without touching the wood. This method works best if you’re tidy, because everything inside is on display. Check with your landlord first, since some leases require doors to stay on the property.
How to Plan a Damage Free Cabinet Makeover
A damage free cabinet makeover depends more on preparation than on the product you choose. Most failures come from grease, dust, or rushed measuring, not bad materials. Open a window or run the fan while you clean and apply adhesives, and read the EPA’s indoor air quality guidance if you’re sensitive to fumes. Then follow a simple routine to protect both the product and the cabinets underneath:
- Photograph every cabinet before you start.
- Remove handles and, if possible, the doors.
- Clean with a degreaser, rinse with water, and dry completely.
- Test the product on a hidden area for a few days.
- Measure twice and cut once, leaving a small margin.
- Save leftover material and the original hardware for move-out.
Final Thoughts on Rental Kitchen Cabinets
You don’t need paint, power tools, or a big budget to make rental kitchen cabinets look better. Vinyl and wallpaper change the surface, covers and curtains hide it, and new hardware or open shelves shift the whole style. Think about your kitchen’s condition, your lease, and how much time you have, then choose the method that fits. A small test patch will tell you more than any product label. Keep your photos, the original hardware, and any leftover material, and moving out will be simple. With a little patience, you can end up with a kitchen that feels like yours and still hand back the keys with your deposit safe. For a related walkthrough, check out Window Privacy Ideas: 7 Easy Renter-Friendly Options.
FAQ: Covering Rental Kitchen Cabinets Without Paint
Will vinyl or contact paper damage my cabinets?
It can, especially on old, peeling, or poorly sealed finishes. Clean the surface, test a hidden spot first, and warm the material with a hair dryer when you remove it. Slow peeling lowers the risk of tearing the finish.
What is the cheapest way to update rental kitchen cabinets?
Contact paper and new hardware cost the least. Even changing only the handles can make a visible difference. Fabric curtains are also cheap if you already own a tension rod and some spare cloth.
Do I need my landlord’s permission?
Check your lease first. Even removable changes may need approval, and a written okay protects you. Ask by email and keep the reply, along with photos of the original cabinets.
How long do these cover-ups last?
It depends on the product, the surface, and your kitchen. Grease, steam, and heat shorten the life of adhesives. Good cleaning before you start and careful pressing during installation help them last longer.
Can I use these methods on textured or damaged doors?
Textured doors are harder. Thick vinyl or door panels hide bumps better than thin paper or wallpaper. If the wood is peeling or crumbling, a curtain or open shelf may be a safer choice.

Ghani Mejber — Founder & Lead Editor
Ghani Mejber is the founder of DIY Homes Hub. After years of living in compact rentals with strict lease rules and limited storage, I started sharing practical, damage-free home upgrades and basic repair guides built for real budgets. Every project I publish focuses on simple tools, accessible materials, and reversible solutions that protect your security deposit.