
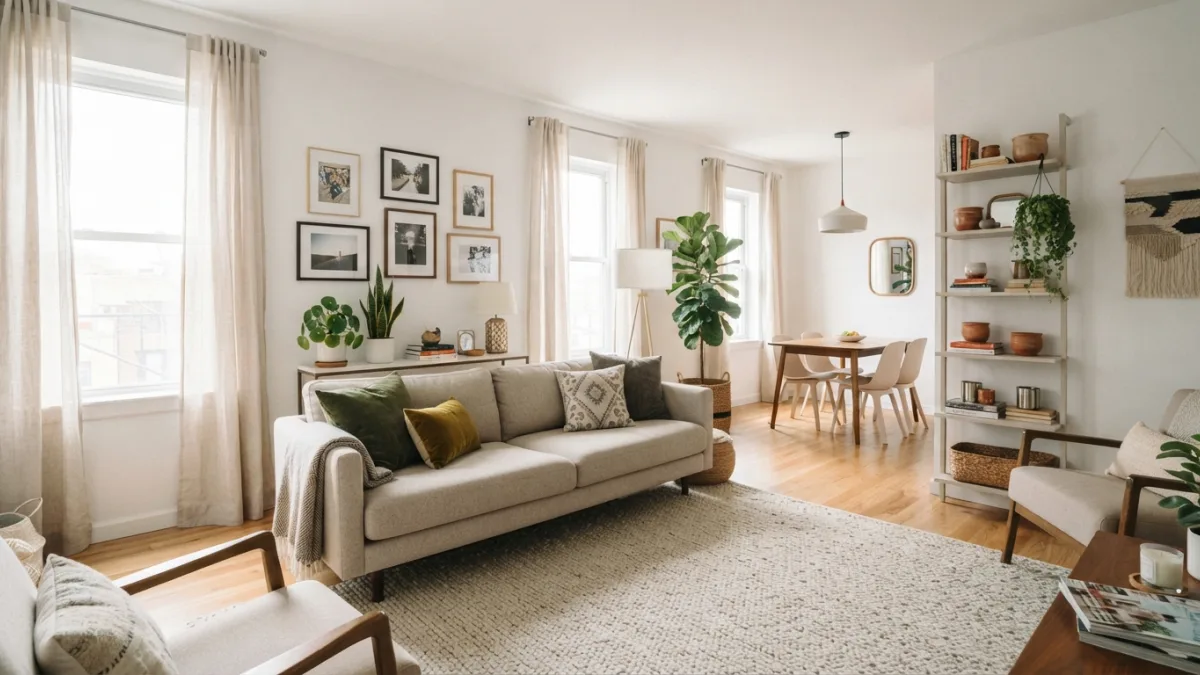
10 Renter-Friendly Upgrades That Won’t Cost Your Deposit
Moving into a rental often feels like living inside someone else’s decorating decisions, and the fear of losing your security deposit can make you hesitant to change a single thing. The good news is that renter friendly upgrades exist for almost every part of your home, letting you personalize your space without risking a single dollar when you move out. From peel-and-stick finishes to clever storage tricks, these updates are designed to be installed and removed cleanly. Whether you’re in a studio apartment or a full house rental, there’s a way to make your space feel like home while keeping your landlord happy and your bank account intact.
Why Renter-Friendly Upgrades Are Worth Considering
Landlords generally allow small, reversible changes, but the real motivation for choosing damage-free upgrades is protecting the money you already put down. Security deposits can range from a few hundred dollars to a full month’s rent, and getting that money back often comes down to how well you restore the space to its original condition. Beyond the financial angle, renter-friendly home improvements let you experiment with style without the long-term commitment of ownership. You can test a bold color scheme or a trendy backsplash for a year, then remove it completely if you change your mind or move to a new place. This flexibility is part of what makes renting appealing to people who like to refresh their surroundings often. If you want to dig deeper, our guide on 15 Storage Ideas for Small Apartments covers this in more detail. This is a common part of dealing with renter friendly upgrades, and it is worth keeping in mind.
10 Renter-Friendly Upgrades That Won’t Cost Your Deposit
Before grabbing a hammer or a bucket of paint, it helps to know which categories of upgrades are the safest bets. Most damage-free apartment upgrades fall into a few groups: wall treatments, lighting, storage solutions, and outdoor touches. Each category has options that range from five-minute fixes to weekend projects, so there’s something here no matter your budget or skill level. Below, we break these down by area of the home, along with tips on how to apply and remove them cleanly. Many people run into this exact issue with renter friendly upgrades at some point.
Walls and Surfaces
Walls are usually the first thing people want to change, and thankfully they’re also the easiest to update without damage these days. Removable wallpaper ideas have exploded in popularity because modern versions peel off cleanly, even after months on the wall, as long as you follow the manufacturer’s instructions for application and removal. Keeping renter friendly upgrades in mind here will save you time later on.
- Removable wallpaper: Great for accent walls, backsplashes, or even furniture and shelving liners.
- Peel and stick backsplash: A quick kitchen or bathroom refresh that mimics tile or subway patterns without any grout or adhesive mess.
- Command hook gallery walls: Use adhesive strips rated for picture frames to build an art wall without a single nail hole.
Lighting and Fixtures
Lighting sets the mood of a room more than almost anything else, and there are plenty of ways to upgrade it temporarily. Just keep the original fixtures stored somewhere safe so you can reinstall them before your final walkthrough. This detail matters more than it seems once renter friendly upgrades comes up again.
- Plug-in pendant lights: These hang from a hook rather than hardwired into the ceiling, giving you designer lighting with zero electrical work.
- Battery-operated puck lights: Perfect for closets, under cabinets, or dark hallway corners that need a little extra glow.
- Dimmer switch covers: Some clip-on versions let you adjust brightness without rewiring anything behind the wall plate.
Storage and Functionality
Small apartments often struggle with storage, and this is one area where renter-friendly upgrades can make a huge practical difference. Tension rods, adhesive hooks, and freestanding shelving units solve storage problems without ever touching the walls or floors. It is one of those small things that makes renter friendly upgrades easier to manage overall.
- Tension rod shelving: Install inside closets or under sinks to double your usable space instantly.
- Over-the-door organizers: Ideal for pantries, bathrooms, or bedroom closets, these hang without any tools at all.
- Stick-on wall hooks: Rated adhesive hooks can hold coats, bags, and even light shelving without leaving marks when removed correctly.
Outdoor and Finishing Touches
If your rental comes with a balcony, patio, or even just a front stoop, small outdoor touches can make the whole home feel more personal. These upgrades also tend to be the least risky, since they rarely interact with the building structure at all. This is a common part of dealing with renter friendly upgrades, and it is worth keeping in mind.
- Potted plants and planters: Add greenery without digging into any shared garden space.
- Outdoor rugs and mats: Instantly upgrade a bland concrete patio or entryway.
- Tension curtain rods: Hang privacy curtains on a balcony or in a window without drilling into brick or siding.
To help you decide where to start, here’s a quick comparison of how these upgrade categories stack up in terms of cost, effort, and how easily they come off when it’s time to move. Many people run into this exact issue with renter friendly upgrades at some point.
| Upgrade Type | Average Cost | Time to Install | Removal Difficulty |
|---|---|---|---|
| Removable Wallpaper | $20–$60 per roll | 1–3 hours | Easy, peels off cleanly |
| Peel and Stick Backsplash | $15–$40 per panel set | 1–2 hours | Easy to moderate |
| Plug-In Pendant Lights | $30–$100 | 15–30 minutes | Very easy |
| Tension Rod Shelving | $10–$30 per rod | 10–20 minutes | Very easy |
| Command Hook Gallery Wall | $15–$40 for hooks | 30–60 minutes | Easy, if weight limits respected |
Protecting Your Security Deposit While You Decorate
Even the safest apartment upgrades no damage projects can go wrong if you skip a few basic precautions. Always test adhesive products on a small, hidden section of wall first, since some paint finishes react differently than others. Take photos of your apartment before you make any changes, and keep them as a record in case there’s ever a dispute about the original condition. It also helps to read your lease agreement carefully, since some buildings have specific rules about wall treatments or hanging items, even temporary ones. A little research upfront saves a lot of stress later, and it keeps your relationship with your landlord on good terms throughout your lease. This connects closely with another common issue — see How to Refresh a Room for Under 0 for more on that. Keeping renter friendly upgrades in mind here will save you time later on.
How to Remove Upgrades Without Leaving a Trace
Removing these upgrades properly is just as important as installing them carefully. Peel adhesive products slowly and at a low angle rather than pulling straight back, which reduces the chance of paint lifting off the wall. For any hooks or mounting strips, a hair dryer on low heat can soften the adhesive and make removal smoother. If you do notice a small mark after removing something, a bit of mild soap and water usually clears it up before it becomes a bigger issue. Keeping the original hardware, like light fixtures or cabinet handles, in a labeled box means you won’t scramble to find them during your move-out walkthrough. This detail matters more than it seems once renter friendly upgrades comes up again.
Renting doesn’t have to mean living in a space that feels temporary or impersonal. With a bit of planning, renter friendly upgrades let you build a home that reflects your taste while keeping your deposit fully intact. Start small if you’re unsure, maybe with a few peel-and-stick tiles or a gallery wall, and expand from there once you see how easily everything comes together and comes apart. The goal isn’t just decoration, it’s creating a space that feels genuinely yours, even if you only plan to stay for a year or two. It is one of those small things that makes renter friendly upgrades easier to manage overall.
Frequently Asked Questions
Do renter-friendly upgrades really come off without damage?
Most do, as long as you follow the product instructions closely and avoid leaving them up far longer than recommended. Quality matters here, so it’s worth spending a little more on well-reviewed brands. This is a common part of dealing with renter friendly upgrades, and it is worth keeping in mind.
Will my landlord notice if I make these changes?
Small, reversible upgrades are usually unnoticeable once removed, but it’s still smart to check your lease or mention bigger changes to your landlord beforehand. Many people run into this exact issue with renter friendly upgrades at some point.
Can I use removable wallpaper on textured walls?
It’s harder to get a smooth finish on heavily textured surfaces, and adhesion can be weaker, so test a small section before committing to a full wall. Keeping renter friendly upgrades in mind here will save you time later on.
What’s the safest way to hang heavier items like mirrors?
Look for heavy-duty adhesive strips rated for the specific weight of your item, and always check the weight limit printed on the packaging before hanging anything. This detail matters more than it seems once renter friendly upgrades comes up again.
How can I make sure I get my full deposit back?
Document your apartment’s condition when you move in, remove all temporary upgrades carefully before you leave, and do a final walkthrough to catch anything you might have missed. It is one of those small things that makes renter friendly upgrades easier to manage overall.
2 Comments