
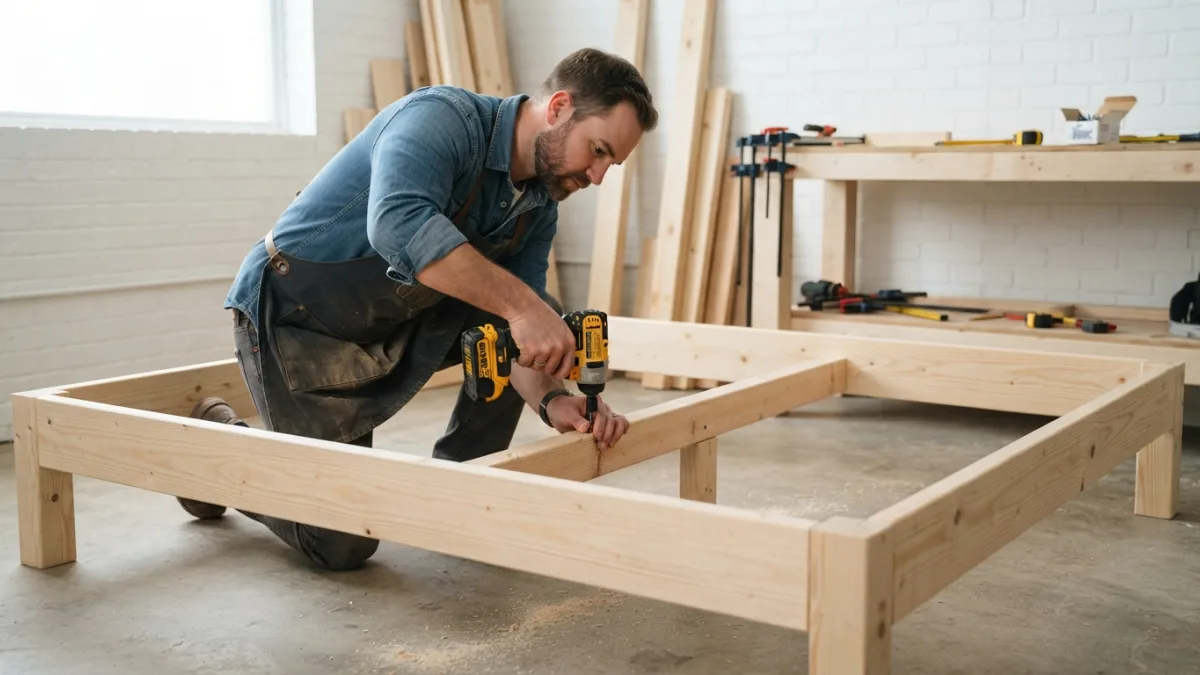
How to Build a Simple Platform Bed (Step-by-Step)
Building your own bed frame sounds intimidating until you realize how few pieces a simple platform bed actually needs. Unlike traditional bed frames that rely on box springs, metal rails, and extra hardware, a platform bed is just a sturdy, flat surface raised slightly off the floor. That simplicity makes it one of the most beginner-friendly furniture projects you can tackle in a weekend. You don’t need a workshop full of power tools or years of carpentry experience. With a few boards, basic tools, and a free afternoon, you can build something that looks like it came from a high-end furniture store. This guide walks you through the entire process, from picking materials to adding the finishing touches, so you can create a bed frame that fits your space, your budget, and your style.
Why Build Your Own Platform Bed?
Store-bought bed frames can cost hundreds or even thousands of dollars, especially if you want something made from solid wood. A diy platform bed lets you skip the markup and put that money toward better materials or a nicer mattress instead. You also get complete control over the size, height, and finish, which matters if you have an oddly shaped bedroom or specific storage needs. Building your own furniture teaches practical skills you’ll use again and again, and there’s real satisfaction in sleeping on something you made with your own hands. Platform beds also tend to be sturdier than flat-pack alternatives because you’re using solid lumber instead of thin particleboard. Once you understand the basic structure, you can adjust the design for future projects, like matching nightstands or a headboard. If you want to dig deeper, our guide on 10 Renter-Friendly Upgrades That Won't Cost Your Deposit covers this in more detail. This is a common part of dealing with simple platform bed, and it is worth keeping in mind.
Tools and Materials You’ll Need
Before you start cutting wood, gather everything so you’re not running to the hardware store mid-project. Most of these items are inexpensive and easy to find at any home improvement store. Many people run into this exact issue with simple platform bed at some point.
- Circular saw or miter saw (or have the lumber yard cut boards to size)
- Drill with driver bits and wood screws
- Wood glue
- Measuring tape, pencil, and a square for marking straight lines
- Sandpaper (medium and fine grit) or an orbital sander
- 2×6 or 2×8 boards for the frame
- 1×4 boards or plywood strips for the slats
- Wood stain, paint, or sealant of your choice
Having everything laid out before you begin keeps the project moving and prevents frustrating delays once you’re already mid-cut. Keeping simple platform bed in mind here will save you time later on.
Choosing the Right Platform Bed Dimensions
Getting your measurements right at the start saves you from headaches later, so this step deserves real attention. Standard mattress sizes include twin, full, queen, and king, and your frame needs to match whichever one you own with a little extra room, usually half an inch on each side. Beyond mattress size, think about the height of the platform itself. Most simple platform beds sit between 12 and 18 inches off the ground, low enough to feel modern but high enough to slide storage bins underneath if you want. If you’re short on space, a lower frame makes a room feel larger. If you like a dramatic look or plan to add a mattress topper, go a bit higher. Write down your final platform bed dimensions before buying lumber, since guessing at the store often leads to costly mistakes. This detail matters more than it seems once simple platform bed comes up again.
Step 1: Cut Your Lumber to Size
Start by measuring and cutting the four main frame pieces: two long side rails and two shorter end rails that will form a rectangle matching your mattress size. Double-check every measurement before cutting, since wood is expensive to waste and mistakes compound quickly once assembly begins. If you don’t own a saw or don’t trust your cutting skills yet, most hardware stores will make straight cuts for you at little or no cost when you buy the lumber there. While you’re at it, cut the pieces for a center support beam, which runs lengthwise down the middle of the frame and prevents sagging over time. This beam matters more than people expect, especially for queen and king sizes where the mattress spans a wider area without enough support underneath. It is one of those small things that makes simple platform bed easier to manage overall.
Step 2: Assemble the Frame
Lay your four rail pieces on the floor in a rectangle shape, with the shorter end pieces fitting between the two longer side pieces to form corners. Apply wood glue along each joint before screwing the pieces together, since glue adds significant strength beyond what screws alone provide. Use at least two screws per corner joint, driven at a slight angle for extra grip. Once the rectangle feels solid, attach your center support beam by screwing it into the middle of both end pieces, running from head to foot of the bed. This step turns a wobbly rectangle into a genuinely rigid frame. Check that everything sits square by measuring diagonally from corner to corner; if both diagonal measurements match, your frame is properly squared and ready for the next stage. This connects closely with another common issue — see How to Refresh a Room for Under 0 for more on that. This is a common part of dealing with simple platform bed, and it is worth keeping in mind.
Step 3: Add Legs or a Base
Your frame needs something underneath it to hold it off the ground, and you have a few options depending on the look you want. Simple wood legs, attached at each corner and along the center beam for larger sizes, work well and keep the design minimal. Alternatively, you can build a solid plywood base with a lower profile, giving the bed a more modern, floating appearance. For legs, precut furniture legs from a hardware store save time and come with mounting plates that screw directly into the frame. Make sure legs are evenly spaced and level, using a level tool to check each one before fully securing it. Uneven legs cause wobbling that becomes obvious the moment someone sits down, so take your time here rather than rushing to the next step. Many people run into this exact issue with simple platform bed at some point.
Step 4: Install the Slats
Slats support your mattress and allow airflow underneath, which helps prevent moisture buildup over time. Space wooden slats about 2 to 3 inches apart across the width of the frame, running perpendicular to the center support beam. Screw each slat into both the side rails and the center beam for maximum stability, rather than just resting them loosely on top. If you prefer a solid surface, plywood sheets cut to fit the frame work just as well and eliminate any gaps entirely. Some people add a layer of thin foam or a rug pad between plywood and mattress to reduce noise and add a bit of cushioning. Either method gives your mattress the even support it needs, which affects both comfort and how long the mattress itself lasts. Keeping simple platform bed in mind here will save you time later on.
Step 5: Sand Every Surface
Once the structure is complete, go over every visible surface with sandpaper, starting with a medium grit and finishing with a fine grit for a smooth result. Pay special attention to corners and edges, since these are the spots people bump into most often and where splinters tend to hide. An orbital sander speeds this process up considerably if you’re working with a larger bed frame, though hand sanding works fine for smaller projects. Wipe away all dust with a damp cloth before moving on to staining or painting, since leftover dust particles can create a rough, uneven finish. This step feels tedious, but skipping it or rushing through it is one of the most common mistakes people make, and it shows immediately once you apply any kind of finish. This detail matters more than it seems once simple platform bed comes up again.
Step 6: Stain, Paint, or Seal
The finishing step transforms your project from a rough wooden frame into a piece that looks intentional and polished. A wood platform bed frame takes stain beautifully, letting the natural grain show through while adding depth and richness to the color. Apply stain with a clean cloth or brush, following the wood grain, and wipe off excess after a few minutes for an even tone. If you prefer a bolder look, paint offers unlimited color options and hides any minor imperfections in the wood. Whichever route you choose, finish with a clear polyurethane or wax sealant to protect against scratches, spills, and everyday wear. Let each coat dry fully before adding the next, and avoid setting your mattress on the frame until the finish has cured completely, usually 24 to 48 hours. It is one of those small things that makes simple platform bed easier to manage overall.
Tips for Extra Stability and Durability
A few small adjustments can make a big difference in how long your bed frame lasts and how sturdy it feels day to day. Adding corner braces on the inside of the frame reinforces joints under heavy use, especially for larger mattress sizes that put more stress on the structure. Using screws instead of nails throughout gives you a much stronger hold, since nails can loosen over time with regular movement. If you notice any wobble after assembly, check that all legs are making even contact with the floor and that no joints have shifted during the building process. Felt pads under the legs protect your flooring and reduce noise on hard surfaces like hardwood or tile. These details take only a few extra minutes but noticeably improve the overall quality of the finished piece. You might also find our article on 15 Storage Ideas for Small Apartments helpful here. This is a common part of dealing with simple platform bed, and it is worth keeping in mind.
Customizing Your Simple Platform Bed
Once you’ve mastered the basic build, there’s plenty of room to make the design your own. Adding a simple wooden headboard changes the entire look of the bed and gives you something to lean against while reading. Built-in storage drawers underneath the platform make excellent use of the extra space, particularly helpful in smaller bedrooms or apartments. Some people add LED strip lighting along the base for a soft glow at night, while others prefer exposed wood joinery for a more rustic, farmhouse feel. Because you built the frame yourself, you already understand its structure well enough to modify it later without starting from scratch. Many popular platform bed plans found online are really just variations on this same basic frame, adjusted slightly for different aesthetics or added features. Many people run into this exact issue with simple platform bed at some point.
Final Thoughts on Building Your Own Bed Frame
Learning how to build a bed frame from scratch is one of those projects that pays off well beyond the money you save. You end up with a piece of furniture built to your exact specifications, sturdy enough to last for years with basic care. The process itself, cutting boards, assembling joints, sanding rough edges, teaches skills that carry over into countless other home projects down the road. Even first-time builders can complete a simple platform bed in a weekend with basic tools and a bit of patience. Once it’s finished and dressed with your favorite bedding, few people will guess it wasn’t bought from a furniture showroom. That’s the real reward of building it yourself: a comfortable, good-looking bed frame that reflects the work you put into it. Keeping simple platform bed in mind here will save you time later on.
Frequently Asked Questions
How much does it cost to build a simple platform bed?
Costs vary depending on wood type and size, but most people spend between 80 and 200 dollars on lumber, screws, and finishing supplies, far less than comparable store-bought frames. This detail matters more than it seems once simple platform bed comes up again.
Do I need a box spring with a platform bed?
No. Platform beds are designed to support a mattress directly on slats or a solid surface, so a box spring isn’t necessary and would actually add unwanted height. It is one of those small things that makes simple platform bed easier to manage overall.
What type of wood works best for a DIY platform bed?
Pine is affordable and easy to work with for beginners, while hardwoods like oak or maple cost more but offer greater durability and a richer finished appearance. This is a common part of dealing with simple platform bed, and it is worth keeping in mind.
How long does it take to build one?
Most builders finish the frame itself in a single day, though staining or painting adds extra time for drying between coats, often stretching the full project across a weekend. Many people run into this exact issue with simple platform bed at some point.
Can a platform bed support a heavy mattress without sagging?
Yes, as long as you include a center support beam and space your slats properly, a well-built frame comfortably supports memory foam, hybrid, or innerspring mattresses of any standard size. Keeping simple platform bed in mind here will save you time later on.