Unclog a Drain: 7 Easy Steps Without Calling a Plumber
That gurgling sound in your bathroom sink or the water pooling around your feet in the shower is never a good sign. But before you panic and reach for the phone to call an expensive plumber, take a breath. Most household clogs are minor annoyances you can fix yourself in under an hour, often with tools already sitting in your kitchen cabinet. Learning how to unclog a drain on your own not only saves you money, it also gives you the confidence to handle the next blockage without stress. This guide walks you through seven simple, tested methods that work on kitchen sinks, bathroom drains, tubs, and showers alike.
Why Drains Get Clogged in the First Place
Before jumping into fixes, it helps to understand what causes the problem. Bathroom drains usually clog from a buildup of hair, soap scum, and toothpaste residue that clings to the inside of the pipe over time. Kitchen sinks, on the other hand, suffer mostly from grease, food particles, and coffee grounds that harden as they cool. Outside, tree roots and mineral deposits can narrow pipes over the years. Knowing the likely culprit actually helps you pick the right clogged drain remedies instead of guessing. A slow drain today can turn into a completely blocked one next week, so it pays to act early rather than waiting for standing water to become a daily inconvenience. If you want to dig deeper, our guide on Basic Tool Kit Every Renter Should Own covers this in more detail.
What You Need Before You Start
You do not need a professional toolbox to tackle most clogs. Gather these basic supplies before you begin, and you will likely have everything within reach already:
- Rubber gloves and old towels
- A cup plunger and a flange plunger
- Baking soda and white vinegar
- A bucket and adjustable pliers
- A flexible drain snake tool or a straightened wire hanger
- A flashlight and a screwdriver
Having these items laid out ahead of time turns a messy, frustrating job into a quick fifteen-minute task. It also means you will not have to run to the hardware store halfway through the project. This connects closely with another common issue — see Command Strip Hacks: 7 Easy Tips Every Renter Should Try for more on that.
Step 1: Start With Boiling Water
This is the simplest place to begin, and it costs nothing. Boil a full kettle or pot of water, then pour it slowly down the drain in two or three stages, letting it work for about 30 seconds between pours. The heat helps dissolve grease, soap residue, and other organic buildup clinging to the pipe walls. This trick works best on kitchen sinks where fat and oil are the main offenders. One word of caution: skip this method if you know your pipes are PVC, since very hot water poured all at once can occasionally warp older plastic fittings.
Step 2: Try the Baking Soda and Vinegar Trick
If boiling water alone does not do the job, move on to one of the most popular clogged drain remedies around the house. Pour about half a cup of baking soda directly into the drain, followed by a cup of white vinegar. The mixture will fizz immediately, which is the reaction breaking down grime and loosening debris stuck to the pipe. Cover the drain with a cloth or stopper to keep the reaction contained, and let it sit for 20 to 30 minutes. Finish by flushing the drain with hot water. The baking soda and vinegar drain method is gentle, cheap, and safe for almost every type of pipe material. You might also find our article on Peel and Stick Backsplash: 5 Easy Before-and-After Tips helpful here.
Step 3: Grab a Plunger to Unclog a Drain Fast
A plunger is often the fastest way to physically dislodge a stubborn blockage. Use a standard cup plunger for sinks, tubs, and showers, and reserve the flange-style plunger for toilets. Fill the sink or tub with a couple of inches of water first, since the suction works better with water covering the plunger’s rim. Block any overflow opening with a wet rag, then plunge vigorously up and down for about 20 seconds before pulling away sharply. Repeat this a few times if needed. Many people are surprised how often this basic tool alone is enough to unclog a drain without any other steps.
Step 4: Bring In a Drain Snake Tool
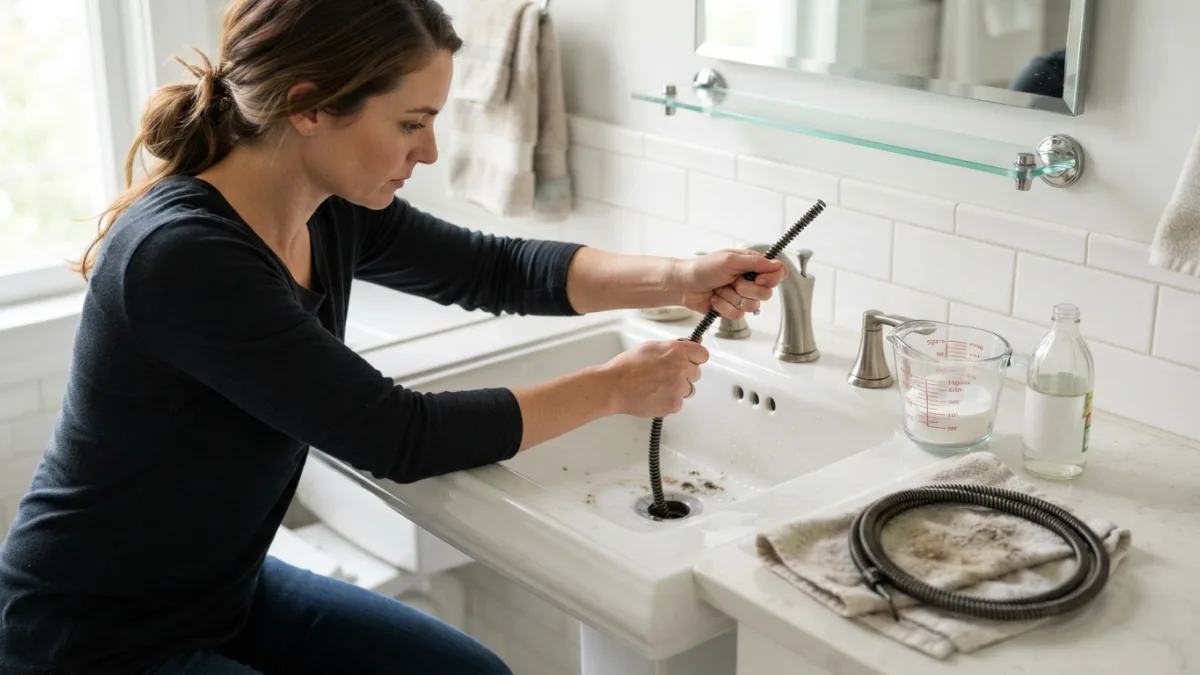
When plunging fails, a drain snake tool is your next move, especially for hair-related clogs in bathroom sinks and tubs. These flexible tools come in cheap plastic versions with barbed edges, as well as metal cable augers for tougher jobs. Insert the tool a few inches into the drain, twist gently, and pull it back out slowly to remove the tangled mess it catches. If you do not own one, a straightened wire coat hanger with a small hook bent at the end works surprisingly well for shallow clogs. Just be careful not to push debris further down instead of pulling it out. For a related walkthrough, check out Kitchen With No Pantry: 7 Easy Organizing Tips to Try.
Step 5: Remove and Clean the P-Trap
Under most sinks sits a curved section of pipe called a P-trap, which is designed to hold a bit of water and prevent sewer gas from entering your home. It is also a common spot where objects and gunk get stuck. Place a bucket underneath to catch any water, then use pliers to loosen the slip nuts on either side of the trap. Slide the trap off, empty it into the bucket, and clean it out with an old brush before reattaching everything by hand. This step feels intimidating the first time, but it is one of the most effective ways to solve a stubborn clog that other methods could not reach.
Step 6: Use a Wet/Dry Vacuum
If you happen to have a wet/dry shop vacuum, it can pull out clogs that resist plungers and snakes alike. Set the vacuum to liquid mode, cover the exhaust filter as instructed by the manufacturer, and create a tight seal over the drain opening using an old plunger head or a damp rag. Turn the vacuum on and let it run for a couple of minutes to suck the blockage up and out of the pipe. This method works particularly well on floor drains, laundry sinks, and garage drains where debris tends to be heavier and more compact than in a bathroom sink.
Step 7: Prevent Clogged Pipes From Coming Back
Once your drain flows freely again, a little maintenance keeps it that way. Install inexpensive mesh strainers over bathroom and kitchen drains to catch hair and food scraps before they enter the pipe. Never pour grease or cooking oil down the sink; let it cool and throw it in the trash instead, following guidance similar to what the EPA recommends for handling fats, oils, and grease. Running hot water through the drain once a week and repeating the baking soda and vinegar treatment monthly are two of the easiest diy plumbing tips for anyone who wants to prevent clogged pipes long term rather than dealing with emergencies repeatedly.
Which Method Should You Try First?
Not every clog responds to the same treatment, so it helps to match the method to the type of blockage you are facing. Use the table below as a quick reference before you start working on the problem.
| Method | Best For | Approximate Time |
|---|---|---|
| Boiling Water | Grease and soap buildup | 5–10 minutes |
| Baking Soda and Vinegar | Mild organic clogs, odors | 30 minutes |
| Plunger | Standing water in sinks, tubs, toilets | 5 minutes |
| Drain Snake Tool | Hair clogs, deeper blockages | 10–20 minutes |
| P-Trap Cleaning | Trapped objects, slow-draining sinks | 15–30 minutes |
| Wet/Dry Vacuum | Stubborn clogs, floor and garage drains | 10 minutes |
A Word About Chemical Drain Cleaners
It might be tempting to grab a bottle of chemical drain cleaner from the store shelf, but these products come with real downsides. The strong acids or bases they contain can cause skin and eye burns, release harsh fumes in a poorly ventilated bathroom, and in some cases damage older or plastic

Ghani Mejber — Founder & Lead Editor
Ghani Mejber is the founder of DIY Homes Hub. After years of living in compact rentals with strict lease rules and limited storage, I started sharing practical, damage-free home upgrades and basic repair guides built for real budgets. Every project I publish focuses on simple tools, accessible materials, and reversible solutions that protect your security deposit.