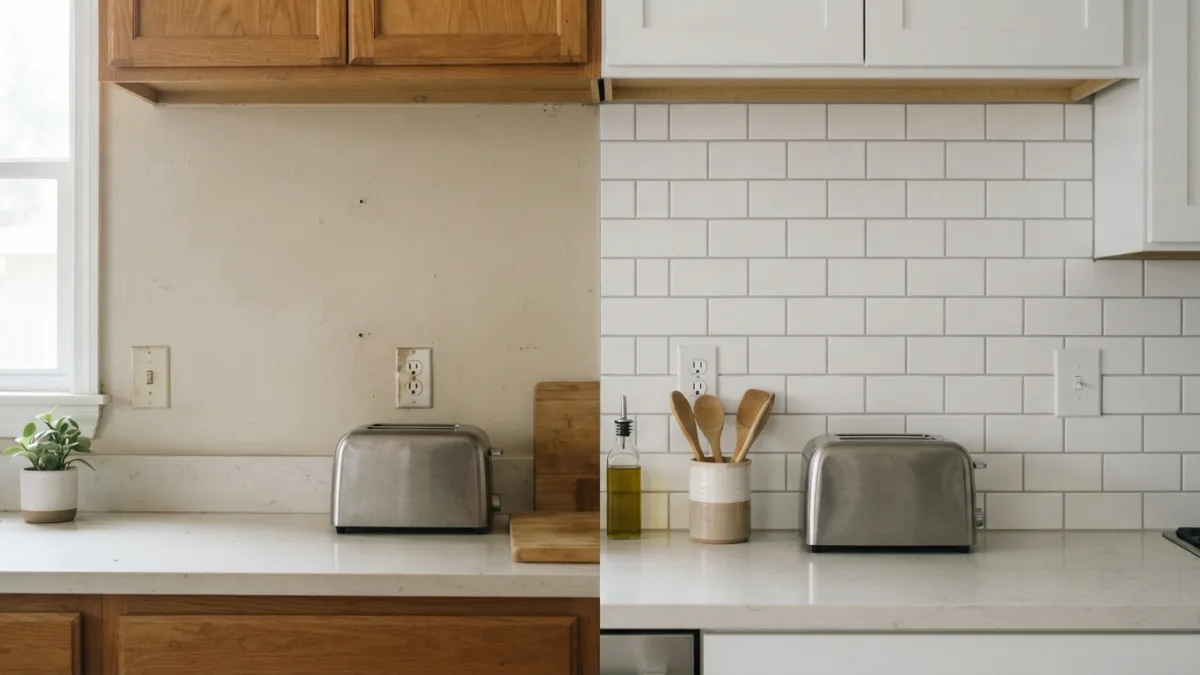
Peel and Stick Backsplash: 5 Easy Before-and-After Tips
A tired, outdated kitchen wall can make an entire room feel dull, and that’s exactly why so many homeowners are turning to a peel and stick backsplash for a quick refresh. This budget-friendly option lets you transform a kitchen in a single weekend without hiring a contractor or dealing with grout and mortar. If you’ve been scrolling through before-and-after photos wondering whether the transformation is really that dramatic, the answer is usually yes, as long as you follow a few key steps along the way.
Why Peel-and-Stick Backsplash Is a Popular Kitchen Backsplash Makeover Choice
Peel-and-stick tiles have become a go-to solution for anyone wanting a fast, affordable kitchen backsplash makeover. Unlike ceramic or glass tile installations that require special tools, adhesive, and often a professional installer, these self-adhesive tile sheets stick directly to a clean wall surface. Many renters love them because they’re removable, which means you can update your space without violating a lease agreement. Homeowners appreciate them too, since the cost per square foot is typically a fraction of traditional tile. Whether you’re working with a tight timeline or a tight budget, this option checks a lot of boxes without sacrificing style. If you want to dig deeper, our guide on Kitchen With No Pantry: 7 Easy Organizing Tips to Try covers this in more detail.
Before You Begin: Assessing Your Kitchen Wall
Every good transformation starts with an honest look at what you’re working with. Take a close look at your current backsplash area and note any bumps, cracks, or uneven texture, since these imperfections can show through the adhesive tiles once applied. If your wall has old wallpaper, peeling paint, or heavy texture, you’ll need to address that before starting. Older homes may also have lead-based paint underneath layers of wall coverings, so if your house was built before 1978, it’s smart to check EPA guidance on renovation and lead paint safety before scraping or sanding anything. Taking a few extra minutes here saves you from redoing the whole project later.
Tip 1: Clean and Prep Your Surface Properly
The single biggest factor separating a stunning transformation from a peeling disaster is surface preparation. Wipe down the wall with a degreaser to remove cooking residue, dust, and any lingering grease film, since kitchen walls collect more grime than people realize. Let the surface dry completely before moving forward. If your wall is painted with a glossy or semi-gloss finish, lightly sand it so the adhesive has something to grip onto. Skipping this step is the number one reason peel-and-stick tiles fail within a few months instead of lasting for years. A clean, dry, slightly textured surface gives you the best possible foundation.
Tip 2: Choose the Right Self-Adhesive Tile for Your Space
Not all self-adhesive tile products are created equal, and picking the right one makes a noticeable difference in your final results. Some are made from PVC or gel resin designed to mimic glass or ceramic, while others are vinyl sheets printed to look like subway tile or natural stone. If you’re near your stovetop, look for products rated as heat-resistant, since some materials can warp near heat sources. Thicker, textured options tend to look more realistic and hide wall imperfections better than thin, flat sheets. Reading reviews and checking material specifications before buying prevents disappointment once the tiles are already on your wall.
Tip 3: Measure Twice, Cut Once
Precise measuring might sound tedious, but it’s what makes the difference between a polished look and a sloppy one. Start by measuring the height and width of your backsplash area, then sketch a rough layout on paper to plan where seams will fall. Outlets, switches, and corners require careful cutting, so a sharp utility knife and a metal ruler are worth having on hand. Many installers recommend starting from a corner or the center of the wall, depending on the pattern, to keep lines symmetrical. Dry-fitting a few tiles before peeling off the backing paper helps you catch spacing issues early, which saves both material and frustration. This connects closely with another common issue — see How to Refresh a Room for Under 0 for more on that.
Tip 4: Master the Installation Technique for a Seamless Look
Applying peel and stick backsplash tiles is more forgiving than traditional tiling, but technique still matters. Peel back a small section of the backing, press the tile firmly into place, and then slowly remove the rest of the paper while smoothing the tile with a plastic scraper or credit card to push out air bubbles. Work in one direction to avoid trapping bubbles under the surface. For tiles designed to interlock or butt against each other, keep seams as tight as possible since gaps become more noticeable once grout-look lines are added. Taking your time during this stage, rather than rushing through an entire wall in one sitting, leads to a much cleaner finished product.
Tip 5: Seal Edges and Add Finishing Touches
Once your tiles are in place, the small details make a big visual difference. Many kits include a clear caulk or edge trim designed to seal the perimeter, particularly around the sink, stove, and countertop where moisture and heat are more concentrated. Applying a thin bead of clear silicone caulk along these edges prevents water from sneaking behind the tiles and extends the lifespan of your backsplash. Trim pieces at outlets and corners give the installation a finished, professional appearance rather than a raw, cut-edge look. This final step often gets skipped, but it’s what makes the difference between a project that looks handmade and one that looks store-bought.
The Before-and-After Transformation: What to Expect
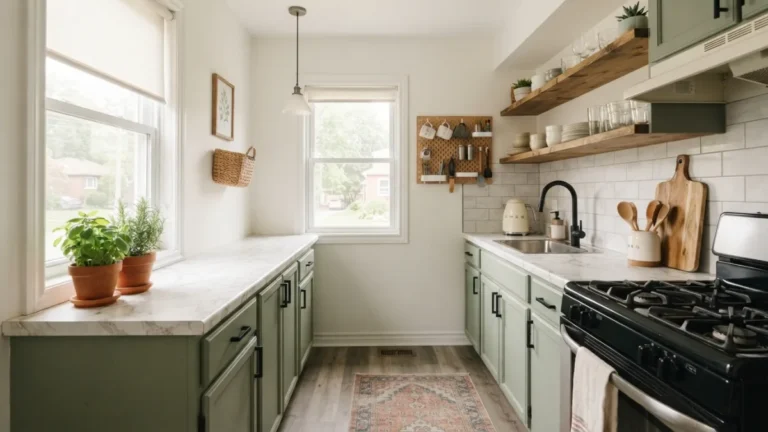
The visual change from a plain painted wall to a tiled backsplash is often the most dramatic update in an entire kitchen renovation. Before photos typically show bare drywall, dated tile, or scuffed paint, while after photos reveal a wall that looks like it belongs in a magazine spread. According to the general history and function of kitchen backsplashes, this wall section has always served both a decorative and protective purpose, and peel-and-stick versions now let more people achieve that upgrade affordably. Homeowners frequently report that the backsplash becomes the first thing guests notice, proving that a relatively small, contained project can carry an outsized visual impact.
Peel-and-Stick vs. Traditional Tile: A Quick Comparison
Deciding between a removable option and a permanent installation depends on your goals, budget, and how long you plan to stay in your home. The table below breaks down some of the key differences to help you decide which route fits your situation best. You might also find our article on Under-Bed Storage Ideas: 9 Easy Ways to Save Space helpful here.
| Factor | Peel-and-Stick Backsplash | Traditional Tile |
|---|---|---|
| Installation time | A few hours to one weekend | Several days, often needs a professional |
| Cost | Generally lower, budget-friendly | Higher, includes materials and labor |
| Removability | Removable, renter-friendly | Permanent, harder to remove |
| Durability | Good for light use, some heat sensitivity | Very durable, long-lasting |
| Design options | Wide variety, including removable wallpaper backsplash styles | Custom but limited by installer skill |
Common Mistakes to Avoid During Installation
Even a simple project can go wrong without a bit of planning. Keeping these common pitfalls in mind will help your backsplash installation go smoothly from start to finish.
- Skipping surface cleaning or sanding, which leads to peeling within weeks
- Installing tiles on a cold or humid day, since adhesive bonds better in moderate, dry conditions
- Rushing the layout and ending up with crooked or mismatched seams
- Placing tiles too close to open flames or high-heat stovetop areas without checking heat ratings
- Forgetting to seal edges near the sink, allowing moisture to seep behind the tiles
Budget and Maintenance: Keeping Your New Backsplash Looking Fresh
One of the biggest draws of a peel-and-stick project is how well it fits into a budget kitchen renovation plan. Most homeowners spend far less than they would on a professionally installed tile backsplash, and the do-it-yourself nature of the project eliminates labor costs entirely. Maintenance is fairly simple too, since most surfaces wipe clean with a damp cloth and mild soap. Avoid abrasive scrubbers or harsh chemical cleaners, which can dull the finish or lift the edges over time. Groups like the National Kitchen and Bath Association often note that even small, affordable updates can meaningfully improve how a kitchen looks and functions, and a fresh backsplash is a clear example of that.
A peel-and-stick project proves that you don’t need a big budget or a long timeline to see a real difference in your kitchen. With the right prep work, quality materials, and a bit of patience during installation, the before-and-after results can rival a much more expensive renovation. Whether you’re refreshing a rental, updating a starter home, or simply tired of staring at the same wall, this approachable project offers a satisfying payoff for a relatively small investment of time and money.
Frequently Asked Questions
How long does a peel and stick backsplash typically last?
With proper surface prep and care, most peel-and-stick backsplashes last several years, though lifespan varies depending on material quality, moisture exposure, and how close the tiles are to heat sources. For a related walkthrough, check out Basic Tool Kit Every Renter Should Own.
Can I install a peel and stick backsplash over existing tile?
Yes, in many cases you can apply it directly over existing tile as long as the surface is clean, flat, and free of major grout lines or damage that could show through.
Will a peel and stick backsplash damage my wall when removed?
Most quality products are designed to remove cleanly, but results depend on the wall’s paint type and how long the tiles have been in place. Testing a small section first is a good idea.
Is a peel and stick backsplash safe to use behind a stove?
Some products are heat-resistant and safe for use near a stovetop, but always check the manufacturer’s heat rating first, since not all materials handle high temperatures well.
How much does a peel and stick backsplash project usually cost?
Costs vary by brand and coverage area, but this option is generally much more affordable than traditional tile installation, making it a popular choice for budget kitchen renovation projects.

Ghani Mejber — Founder & Lead Editor
Ghani Mejber is the founder of DIY Homes Hub. After years of living in compact rentals with strict lease rules and limited storage, I started sharing practical, damage-free home upgrades and basic repair guides built for real budgets. Every project I publish focuses on simple tools, accessible materials, and reversible solutions that protect your security deposit.