Find a Wall Stud: 7 Easy Tricks Without a Stud Finder
Hanging a heavy mirror or mounting a floating shelf without knowing what’s behind the drywall is a recipe for disaster. Anyone who has ever watched an anchor rip out of plaster, taking a chunk of paint with it, knows the frustration. Learning to find a wall stud without buying a single gadget is a skill that pays off for the life of your home, and it takes less time than a trip to the hardware store.
Studs are the vertical wooden or metal framing pieces that hold up your walls, and they’re the only safe place to anchor anything with real weight. Drywall alone can’t support much more than a picture frame, so skipping this step is risky. Fortunately, builders follow predictable patterns when they frame a house, which means you can often guess a stud’s location with surprising accuracy just by using your eyes, ears, and a few household items you already own. If you want to dig deeper, our guide on Patch a Wall Hole: 5 Easy Steps to Perfect Results covers this in more detail.
1. Learn Stud Spacing Standards First
Before you start tapping on walls, it helps to understand stud spacing standards, because most homes follow the same basic layout. In North America, studs are almost always placed 16 inches apart, measured from center to center, though some newer or larger builds use 24-inch spacing instead. This pattern isn’t random; it follows building codes designed for structural safety, as outlined in general framing guidelines from sources like Wikipedia’s overview of wall studs. Once you locate one stud, you can usually measure out in either direction and land close to the next one. Corners and areas around doors and windows sometimes break this rule, so treat the standard spacing as a strong starting point rather than a guarantee.
2. Try the Knock Test Method
The knock test method is probably the oldest trick in the book, and it works because solid wood sounds different from hollow drywall. Start near a corner and gently knock along the wall with your knuckle, moving a few inches at a time. A hollow, echoey sound means you’re between studs, while a duller, more solid thud means you’ve likely found one. It takes a little practice to train your ear, so try testing near an outlet or corner first, where you already have a good guess about stud location. Once you get a feel for the sound difference, this method becomes fast and surprisingly reliable for everyday projects.
3. Use the Tape Measure Trick
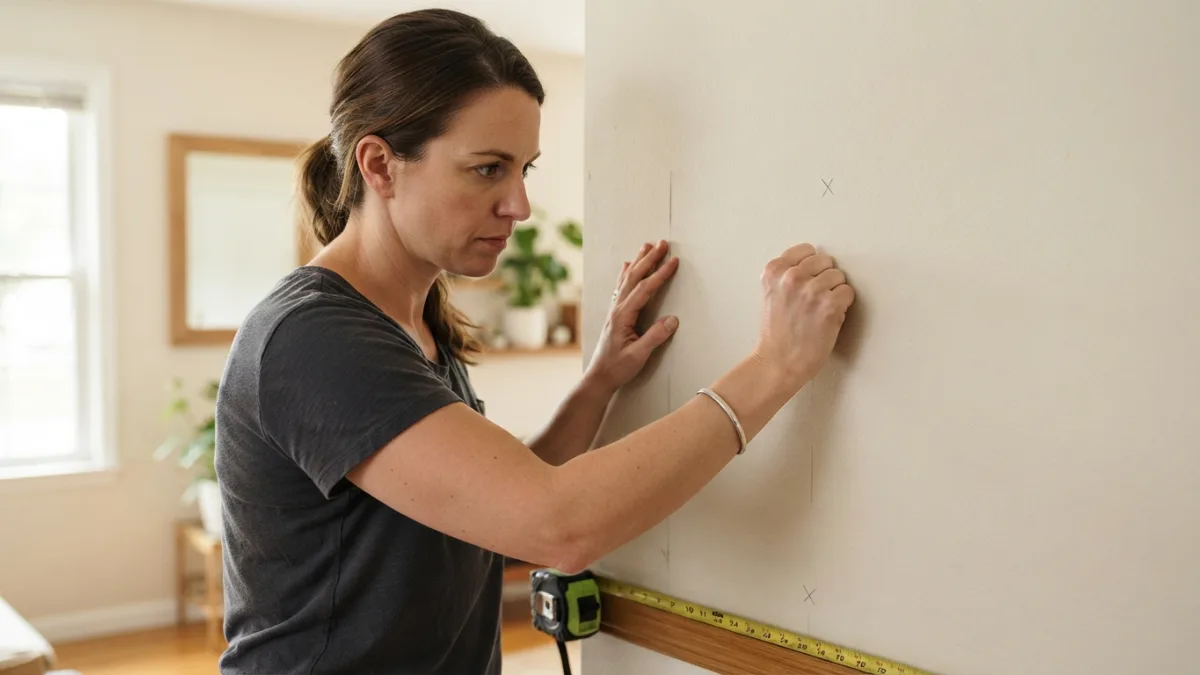
If you’ve already found one confirmed stud, the tape measure trick lets you predict the rest without any more guesswork. Since studs typically sit 16 inches apart on center, hook your tape measure at the middle of that first stud and measure across in 16-inch increments along the wall. Mark each spot lightly with a pencil, then double-check with a knock test or by looking for other visual clues. This method works especially well in newer homes where construction tends to follow standard spacing more consistently. Older homes, especially those built before modern codes, sometimes have irregular framing, so always verify your measurements before drilling. This connects closely with another common issue — see Unclog a Drain: 7 Easy Steps Without Calling a Plumber for more on that.
4. Look for Outlet and Switch Clues
Outlet and switch clues are one of the most reliable ways to find a wall stud without any tools at all. Electricians almost always attach electrical boxes to the side of a stud for stability, so an outlet or light switch is a strong sign that wood framing sits just to one side of it. Gently knock on both sides of the outlet cover to figure out which direction the stud lies. Keep in mind that the stud is usually right next to the box rather than directly behind it, so don’t drill straight through the outlet itself. This clue works in nearly every room, since almost every wall has at least one outlet.
5. Check the Baseboard Nail Pattern
Look down before you look anywhere else, because the baseboard nail pattern often gives away exactly where the studs are hiding. Baseboards are nailed into studs during installation, and those nail heads are usually visible if you look closely, especially under a coat of paint or caulk. Small dimples, slightly raised paint bumps, or filled nail holes along the bottom trim typically line up with the studs above them. Run your finger along the baseboard if the light isn’t cooperating, since you can often feel these small imperfections even when you can’t see them clearly. This trick pairs well with the tape measure method for double-checking your guess.
6. Try the Flashlight Shadow Technique
The flashlight shadow technique relies on the fact that drywall is rarely perfectly flat where it meets a stud. Turn off the room lights and hold a flashlight at a low angle, shining it sideways across the wall’s surface. Small dimples, seams, or slight ridges will cast shadows, and these often mark the spots where drywall screws or nails were driven into the framing behind. It takes a steady hand and a dark room to see the effect clearly, but once you spot one line of dimples, you can usually trace it vertically to confirm a full stud location. This method works especially well on smooth, unpainted, or lightly textured walls. You might also find our article on Squeaky Door or Cabinet: 5 Easy Fixes to Try Today helpful here.
7. Use a Magnet for Nails
A magnet for nails is one of the simplest tricks, since drywall is attached to studs with metal nails or screws that a strong magnet can detect right through the wall surface. A refrigerator magnet works in a pinch, but a small neodymium magnet, the same type used in many everyday tools, is far more sensitive and easier to use, as explained on Wikipedia’s page on neodymium magnets. Tie a piece of string to the magnet or tape it to a small handle, then slide it slowly across the wall in a grid pattern. When it snags or pulls slightly, you’ve likely found a fastener sitting directly over a stud. Mark that spot and repeat nearby to confirm the vertical line of the framing.
Common Stud Finding Mistakes to Avoid
Even with all these tricks, a few common stud finding mistakes trip people up again and again. Relying on just one method without double-checking is probably the biggest one, since sounds and shadows can be misleading on their own. Here are some other pitfalls worth avoiding:
- Assuming every wall follows the standard 16-inch spacing without checking near corners or openings
- Drilling a test hole without first checking for pipes or wiring behind the drywall
- Confusing a horizontal furring strip or blocking piece for a full vertical stud
- Ignoring exterior walls, which sometimes have different framing than interior partitions
- Skipping a second confirmation method after finding what seems like a stud
Taking an extra minute to cross-check your findings saves you from a wall full of unnecessary holes. For a related walkthrough, check out Basic Tool Kit Every Renter Should Own.
Putting It All Together to Find a Wall Stud With Confidence
None of these methods need to work alone, and combining two or three of them gives you the most reliable results. Start with the outlet and switch clues or the baseboard nail pattern to get a rough idea of where the framing runs, then confirm with a knock test or the tape measure trick before you commit to drilling. Whether you’re hanging a television, a heavy mirror, or a set of floating shelves, taking a few extra minutes with these low-tech tricks can prevent damage and give you real confidence in your wall anchors. A stud finder is convenient, but it’s not the only way to get the job done right.
Frequently Asked Questions
How far apart are wall studs usually placed?
Most homes use 16-inch spacing measured center to center, though some newer construction uses 24-inch spacing instead. Always confirm with at least one physical test before drilling.
Can I really find a wall stud just by knocking on the wall?
Yes, though it takes some practice. A hollow sound means you’re between studs, while a solid, duller thud usually means wood is right behind the drywall.
Do outlets always sit next to a stud?
Almost always, since electrical boxes need something solid to attach to. The stud is typically on one side of the box rather than directly behind it.
Will a regular refrigerator magnet work to find nails in the wall?
It can, but a small neodymium magnet is far more sensitive and will detect nails or screws through drywall much more easily.
Is it safe to drill into a wall without a stud finder?
Yes, as long as you use at least two confirmation methods, such as the knock test paired with the tape measure trick, before making any holes.

Ghani Mejber — Founder & Lead Editor
Ghani Mejber is the founder of DIY Homes Hub. After years of living in compact rentals with strict lease rules and limited storage, I started sharing practical, damage-free home upgrades and basic repair guides built for real budgets. Every project I publish focuses on simple tools, accessible materials, and reversible solutions that protect your security deposit.