Fix a Dripping Faucet: 7 Easy Steps for Beginners Today
That steady drip-drip-drip coming from your kitchen or bathroom sink isn’t just annoying at 2 a.m. It’s also wasting water and quietly adding dollars to your utility bill every single month. Fortunately, you don’t need to call a plumber or spend a fortune to solve the problem. Most homeowners can fix a dripping faucet in under an hour with a handful of basic tools and a little patience. This guide breaks the process down into seven simple steps designed for total beginners, so you can stop the leak, save some money, and feel pretty proud of yourself in the process.
Before you grab a wrench, it helps to understand that faucets come in a few different styles, and each one fails in slightly different ways. Some drips come from a worn-out rubber part, while others come from mineral buildup or a cracked seal. Once you know which type of faucet you’re dealing with and why it’s leaking, fixing a dripping faucet becomes a lot less intimidating. Let’s walk through the process step by step, starting with the most important part of any repair job: figuring out exactly what’s wrong. If you want to dig deeper, our guide on Squeaky Door or Cabinet: 5 Easy Fixes to Try Today covers this in more detail.
Step 1: Figure Out What’s Causing Your Dripping Faucet
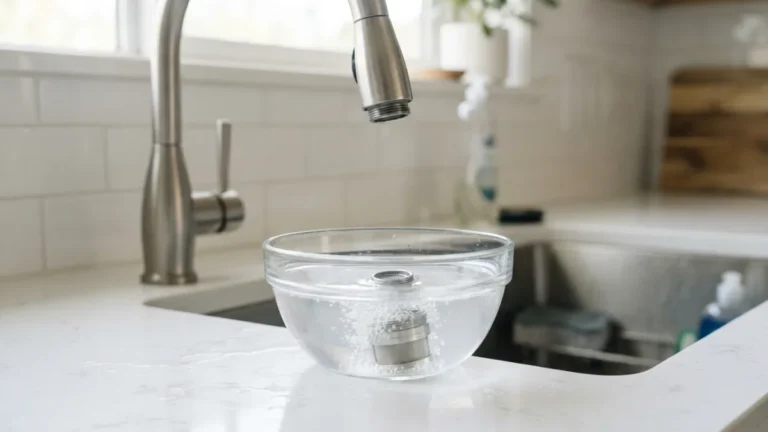
Every repair starts with a little detective work, and understanding dripping faucet causes will save you time and unnecessary parts shopping. In most homes, the drip comes from worn-out washers, O-rings, or seals that have hardened or cracked after years of daily use. Hard water can speed this up because mineral deposits scratch and corrode the small rubber components inside the faucet. Sometimes the issue is simpler, like a loose part or a worn valve seat where the washer sits. Take a moment to watch where the water is actually coming from. A drip at the spout usually points to internal wear, while water pooling around the base often means a bad O-ring. This quick observation narrows down your next steps significantly.
Step 2: Gather Your Faucet Repair Tools
You don’t need a professional toolbox to handle this job, but having the right faucet repair tools on hand makes everything smoother. A basic list includes an adjustable wrench, a Phillips and flathead screwdriver, an Allen wrench set, plumber’s grease, and a rag or towel to catch drips and protect the sink finish. It’s also smart to pick up a small repair kit matching your faucet brand, since these usually include the exact washers, O-rings, and springs you’ll need. Keep a shallow bowl nearby for tiny screws, so nothing rolls down the drain. Having everything laid out before you start prevents that frustrating mid-repair trip to the hardware store in your socks.
Step 3: Shut Off the Water and Take the Faucet Apart
This step matters more than people expect, and skipping it is how bathrooms flood. Locate the shutoff valves under the sink and turn them clockwise until they stop, then open the faucet to release any remaining pressure in the lines. Plug the drain with a rag so small parts can’t disappear into the pipes. Next, look for the decorative cap on the faucet handle, pop it off with a flathead screwdriver, and remove the screw underneath to lift the handle away. Take a photo with your phone before removing anything else. It sounds unnecessary, but it becomes a lifesaver when you’re staring at a pile of parts later, trying to remember which piece goes where during reassembly. This connects closely with another common issue — see Unclog a Drain: 7 Easy Steps Without Calling a Plumber for more on that.
Step 4: Fix a Compression Faucet the Right Way
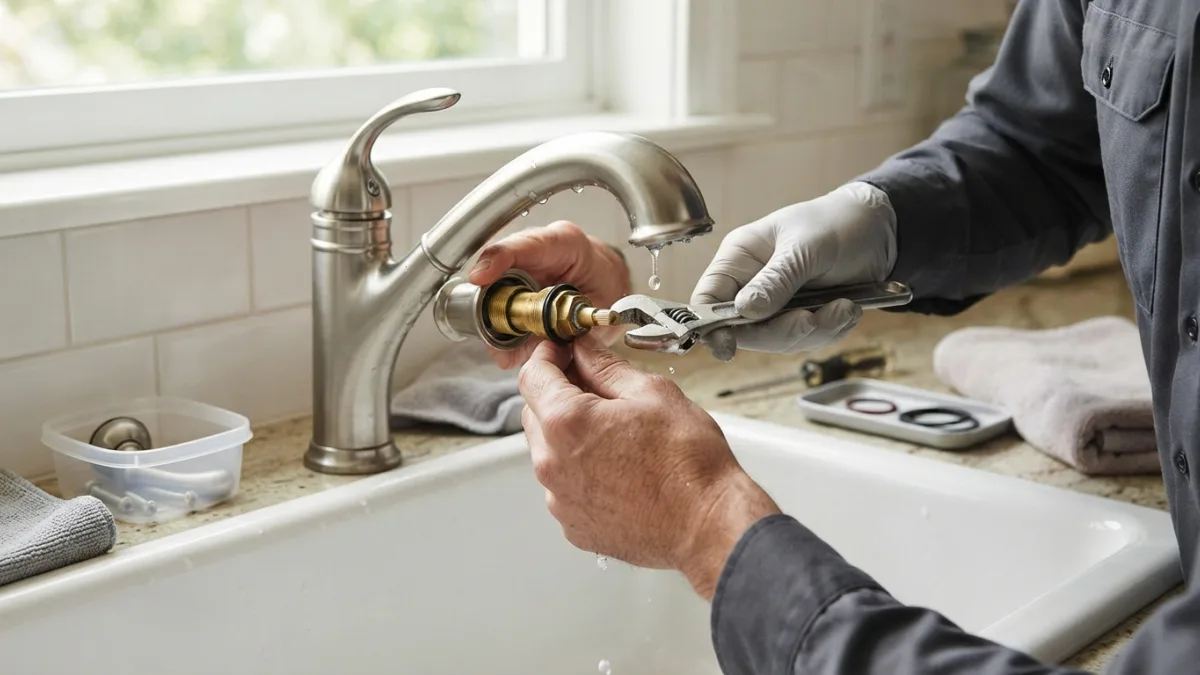
Older two-handle faucets, especially in older homes, are usually compression faucets, and compression faucet repair is often the easiest type of fix for beginners. These faucets use a stem with a rubber washer that presses down against a valve seat to stop water flow. Over time, that washer wears out and stops sealing properly, which causes the classic slow drip. Once you’ve removed the handle and stem, you’ll see the washer held on by a small brass screw at the bottom.
Faucet Washer Replacement: The Most Common Fix
This is where faucet washer replacement comes in, and it’s genuinely one of the most satisfying five-minute fixes in home repair. Remove the old screw, pull off the worn washer, and replace it with an exact match from your hardware store or repair kit. While you’re in there, check the O-ring around the stem too, since a stiff or cracked one is another common source of leaks around the handle base. Coat the new washer and O-ring lightly with plumber’s grease before reassembling, then screw everything back together snugly, but don’t overtighten it, since that can crack the new parts almost immediately.
Step 5: Fix a Ball Faucet Without Calling a Plumber
Single-handle kitchen faucets often use a ball mechanism, recognizable by the rounded cap under the handle and a single lever that moves in every direction to control temperature and flow. Ball faucet repair involves a few more small parts than a compression faucet, including springs, seats, and a rubber cam. After removing the handle, use a specific ball-faucet wrench, often included in repair kits, to unscrew the cap and lift out the ball. Inspect the seats and springs underneath the ball for wear, and swap them for new ones from your kit. Slide the ball back in aligned with the slot, replace the cam and packing, then thread the cap back on by hand before finishing with the wrench. You might also find our article on Patch a Wall Hole: 5 Easy Steps to Perfect Results helpful here.
Step 6: Fix a Cartridge Faucet in Under an Hour
Many modern bathroom and kitchen faucets, including single and double-handle models, rely on a cartridge system instead of a rubber washer. Cartridge faucet repair is straightforward once you know the trick: after removing the handle and retaining clip, the entire cartridge usually pulls straight out with a firm, steady tug, sometimes with the help of small pliers. Bring the old cartridge with you when buying a replacement, since these vary quite a bit between brands and even between models from the same manufacturer. Push the new cartridge in until it clicks into place, matching the original orientation, then reattach the clip, handle, and decorative cap. This type of repair rarely requires greasing, since most cartridges come pre-lubricated from the factory.
Step 7: Reassemble, Test, and Weigh the Leaky Faucet Cost
With the internal parts replaced, put the handle back on, tighten the screw, and snap the decorative cap into place. Turn the shutoff valves back on slowly and check for leaks around the base and handle before running the water for a minute or two. If the drip has stopped and everything looks dry, you’ve successfully finished the job. It’s worth thinking about the overall leaky faucet cost here too: a basic repair kit typically runs a few dollars, compared to a professional plumber visit that can cost significantly more depending on where you live. According to the EPA’s WaterSense program, household leaks waste a surprising amount of water nationwide each year, so a quick fix genuinely pays for itself. If the drip continues after your repair, the valve seat itself may be damaged, and that’s a good moment to consider calling a professional.
How to Prevent Faucet Leaks in the Future
Once you’ve done the repair, a little maintenance goes a long way toward keeping things dry. Learning how to prevent faucet leaks is mostly about avoiding the habits that wear parts out faster in the first place. Avoid cranking handles shut too forcefully, since that stresses washers and seats over time and shortens their lifespan considerably. If you live in an area with hard water, consider a water softener, since mineral buildup is one of the biggest hidden causes of faucet wear, as explained on Wikipedia’s overview of taps and valves. Replacing worn washers every few years as routine maintenance, rather than waiting for a full-blown drip, keeps your fixtures working smoothly and saves you from repeating this whole process sooner than necessary. For a related walkthrough, check out Basic Tool Kit Every Renter Should Own.
Comparing Common Faucet Types
| Faucet Type | Common Cause of Drip | Difficulty for Beginners |
|---|---|---|
| Compression | Worn rubber washer | Easy |
| Ball | Worn springs or seats | Moderate |
| Cartridge | Worn or damaged cartridge | Easy to Moderate |
| Disc | Worn seals or debris on disc | Moderate |
Frequently Asked Questions
How do I know what type of faucet I have?
Look at the handles and moving parts. One handle that moves side to side and up and down is usually a ball or cartridge faucet, while two separate handles that twist point to a compression faucet. Removing the handle cap usually reveals which mechanism sits underneath.
Can I fix a dripping faucet without turning off the water?
No. Always shut off the water supply valves under the sink first. Working on a faucet with the water still on can cause flooding and makes it much harder to remove and replace parts safely.
How much does it cost to fix a dripping faucet myself?
A basic repair kit with washers, O-rings, or a cartridge usually costs a small amount at any hardware store. This is far cheaper than hiring a plumber, which often charges a service fee plus labor even for a simple fix.
Why does my faucet still drip after I replaced the washer?
This usually means the valve seat is corroded or scratched, preventing a proper seal even with a new washer. A valve seat grinding tool can smooth it out, or you may need to replace the seat entirely.
Is a dripping faucet really wasting that much water?
Yes. Even a slow drip adds up to a noticeable amount of wasted water over weeks and months, which is why fixing it quickly makes sense both for your wallet and for water conservation efforts.

Ghani Mejber — Founder & Lead Editor
Ghani Mejber is the founder of DIY Homes Hub. After years of living in compact rentals with strict lease rules and limited storage, I started sharing practical, damage-free home upgrades and basic repair guides built for real budgets. Every project I publish focuses on simple tools, accessible materials, and reversible solutions that protect your security deposit.