DIY Floating Shelves: 7 Easy Ideas for Any Room You Love
There’s something deeply satisfying about turning a bare wall into a functional, good-looking storage spot without spending a fortune on furniture. That’s exactly why DIY floating shelves have become one of the most popular weekend projects for renters and homeowners alike. They add storage, display space, and personality to a room, and you don’t need to be a professional carpenter to pull them off. Whether you’re working with a tiny apartment or a sprawling family home, floating shelves adapt to almost any space and budget.
Why DIY Floating Shelves Work in Any Room
Floating shelves look like they’re magically attached to the wall, with no visible brackets holding them up. That clean, minimalist wall storage look is a big part of their appeal, but the real advantage is flexibility. You can install them at any height, in any length, and in almost any material, which means they fit kitchens, bathrooms, hallways, bedrooms, and home offices equally well. They also cost far less than built-in cabinetry or store-bought bookcases, and most projects can be finished in an afternoon. If you’re tight on space, they free up floor area that a traditional shelving unit would eat up, which matters a lot in smaller homes. If you want to dig deeper, our guide on Vertical Storage Hacks: 7 Easy Ideas for Tiny Bedrooms covers this in more detail.
1. Minimalist Wood Shelves for a Clean, Modern Look
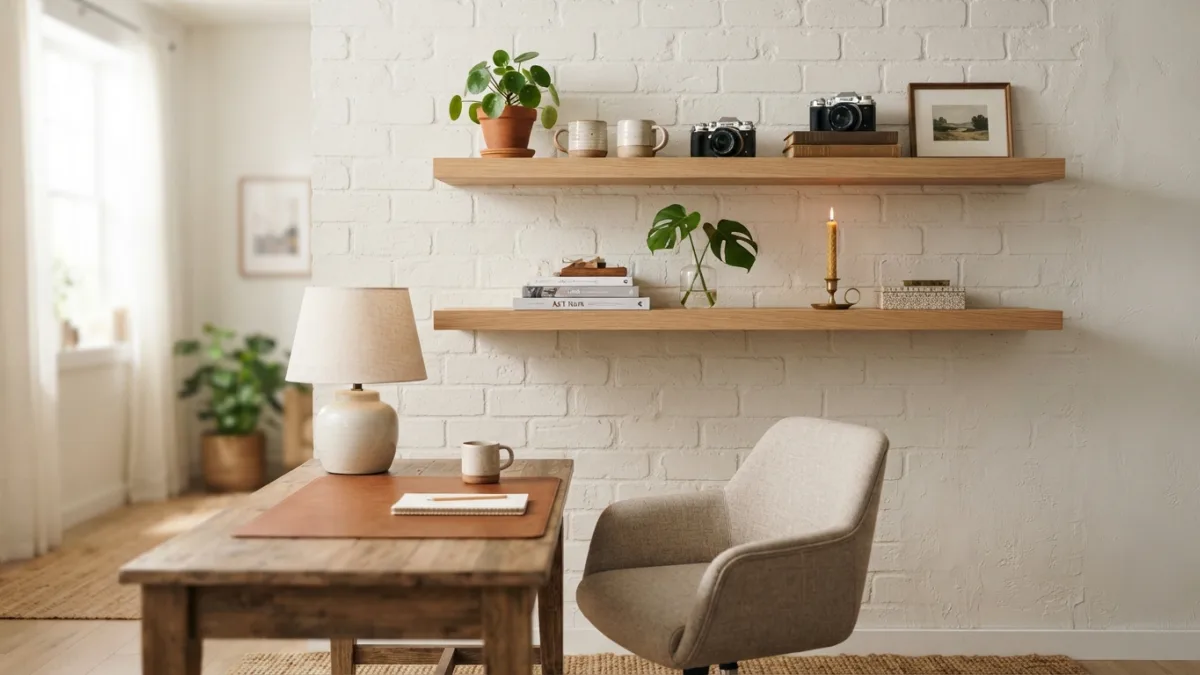
If you want a shelf that blends into almost any decor style, a simple wood plank with hidden brackets is hard to beat. Pine, oak, and birch plywood are all easy to find at hardware stores and simple to cut to size. Sand the edges smooth, add a coat of stain or clear sealant, and mount it using a hidden floating shelf bracket system that slides into a routed channel on the back of the board. This approach keeps the visual line uninterrupted, which is the whole point of a floating look. For a slightly more textured feel, try a live-edge wood slab instead of a perfectly straight board.
2. Reclaimed Wood Shelves for Rustic Charm
Reclaimed wood brings warmth and character that new lumber just can’t match, and it’s one of the most popular wood shelving ideas for farmhouse or industrial-style rooms. Old barn wood, pallet boards, or salvaged fence planks all work well once they’re cleaned, sanded, and treated for splinters. The slight imperfections, knots, and weathering marks are actually the selling point here, so don’t over-sand them. Pair reclaimed wood shelves with black metal brackets for an industrial contrast, or keep the mounting hardware hidden if you want the rustic texture to be the only visual statement in the room.
3. Corner Floating Shelves to Maximize Tight Spaces
Corners are some of the most underused areas in any home, and a triangular or curved floating shelf can turn that dead space into usable storage. These work especially well in small bedrooms, reading nooks, or narrow hallways where a standard rectangular shelf simply won’t fit. Corner shelves are usually shorter and lighter, so they’re a good beginner project if you’re new to DIY floating shelves and want to practice your measuring and leveling skills before tackling a bigger piece. Stack two or three at different heights for a mini display wall that doesn’t take up any floor space at all.
4. Kitchen Floating Shelves for Open, Everyday Storage
Open kitchen shelving has stuck around for years because it makes everyday dishes, glasses, and cookbooks easy to grab while adding a lived-in, welcoming feel to the room. Floating shelves in the kitchen usually need sturdier brackets than a decorative shelf in a living room, since stacked plates and mugs get heavy fast. Choose solid wood or a wood-laminate board at least three-quarters of an inch thick, and always anchor into wall studs rather than relying on drywall anchors alone. If you cook a lot, keep the shelves near the stove for spices and oils, or above the counter for glassware you use daily. This connects closely with another common issue — see Patch a Wall Hole: 5 Easy Steps to Perfect Results for more on that.
5. Bathroom Floating Shelves for Towels and Decor
Bathrooms are often short on storage, and floating shelves solve that problem without crowding a small footprint. A shelf above the toilet or beside the sink is a classic spot for folded towels, plants, or candles, and it instantly makes the space feel more finished. Because bathrooms deal with humidity, choose moisture-resistant materials like sealed wood, MDF with a waterproof coating, or even treated bamboo. Skip anything untreated, since regular wood can warp or swell over time in a damp environment. A quick coat of polyurethane sealant on all sides, including the edges, goes a long way toward protecting your work.
6. Floating Shelves With Hidden Brackets for a Seamless Finish
For anyone chasing that truly invisible, “floating” effect, hidden bracket systems are the way to go. These typically involve a metal rod or bar that’s mounted directly into wall studs, with the shelf sliding over it so no hardware is visible from any angle. This method takes a bit more precision during wall shelf installation, since the holes need to line up exactly, but the payoff is a shelf that genuinely looks like it’s hovering. Concepts like this rely on basic cantilever principles, where the shelf is supported entirely from one end anchored inside the wall. It’s a slightly more advanced project, but tutorials and pre-made bracket kits make it accessible for most confident beginners.
7. Kids’ Room Floating Shelves for Books and Toys
Floating shelves are a favorite in children’s rooms because they display books face-out, which studies on early literacy suggest can make kids more likely to pick up a book on their own. Keep shelves lower and shorter in a child’s room so kids can reach them safely, and round off any sharp corners during construction. Bright colors, painted finishes, or fun shapes like clouds or stars can turn a simple shelf into a decor piece as much as a storage solution. Just make sure every shelf is anchored securely into studs, since kids may pull or climb on furniture more than adults expect.
Tools and Materials You’ll Need
Most floating shelf projects require a fairly small toolkit, which is part of what makes them such an approachable weekend project. Here’s a basic list to get started: You might also find our article on Removable Wallpaper: 7 Easy Steps to Avoid Mistakes helpful here.
- A stud finder to locate solid wall support
- A level to keep your shelf perfectly horizontal
- A drill with appropriate drill bits and a screwdriver attachment
- Wood screws or bolts rated for your shelf’s expected weight
- Sandpaper, wood stain, or paint for finishing
- Wall anchors for areas where studs aren’t available
Beyond these basics, the specific bracket system you choose will determine what extra hardware you need, so it helps to pick your design before you shop.
Comparing Floating Shelf Bracket Types
Not all floating shelf brackets are built the same way, and choosing the right type depends on how much weight the shelf needs to hold and how much of a “floating” look you want to achieve. Here’s a quick comparison to help you decide:
| Bracket Type | Weight Capacity | Difficulty Level | Best For |
|---|---|---|---|
| Hidden rod/bar brackets | Medium to high | Moderate to advanced | Seamless, invisible-look shelves |
| L-brackets (concealed) | Medium | Beginner-friendly | Kitchens, bedrooms, general use |
| Shelf pins with routed channel | Low to medium | Moderate | Decorative or lightweight display shelves |
| Heavy-duty steel brackets | High | Beginner-friendly | Kitchen or garage storage with heavier loads |
How to Install Floating Shelves Safely
Safety matters more with wall shelf installation than people usually expect, especially once you start loading shelves with books, dishes, or decor. Always locate wall studs before drilling, since drywall alone generally can’t support real weight over time. If a stud isn’t available exactly where you want the shelf, use rated wall anchors designed for the specific weight range you’re planning to hold. The U.S. Consumer Product Safety Commission’s anchoring guidance is a useful reference for understanding why secure wall mounting matters, particularly in homes with children who might pull on shelves or use them for climbing. Double-check your level before final tightening, and give any adhesive or filler time to cure fully before adding weight.
Common Mistakes to Avoid
Even simple projects go wrong when a few small details get skipped. Watch out for these common errors: For a related walkthrough, check out Budget Living Room Makeover: 7 Easy Ideas for a Rich Look.
- Skipping the stud finder and relying only on drywall anchors for heavy loads
- Not leveling the shelf before final drilling
- Choosing wood that’s too thin for the intended weight
- Forgetting to seal wood in humid rooms like bathrooms or kitchens
- Overloading a shelf beyond its rated capacity
Taking a little extra time at the planning stage saves you from redoing the whole project later, and it keeps your walls and belongings safe.
Floating shelves prove that small home upgrades can make a big visual difference without draining your weekend or your wallet. Whether you’re drawn to a rustic reclaimed-wood look, a sleek modern design with hidden brackets, or a simple corner shelf for a kid’s room, there’s a version of this project suited to your skill level and your space. Start with one shelf, get comfortable with the tools, and you’ll likely find yourself planning the next one before the first coat of sealant even dries.
Frequently Asked Questions
How much weight can DIY floating shelves hold?
It depends on the bracket type, the wood thickness, and whether the shelf is anchored into studs. A well-built shelf secured into studs with sturdy brackets can typically hold 20 to 50 pounds, while lighter decorative brackets hold less.
Do floating shelves need to be mounted into wall studs?
Whenever possible, yes. Studs provide the strongest support, especially for kitchen or bathroom shelves carrying real weight. If studs aren’t available, use heavy-duty wall anchors rated for your shelf’s expected load.
What’s the best wood for DIY floating shelves?
Solid pine, oak, birch plywood, and reclaimed wood are all popular choices. For humid rooms like bathrooms or kitchens, choose sealed or treated wood to prevent warping over time.
Can I install floating shelves without power tools?
It’s possible with basic hand tools, but a drill makes the process much faster and more precise. A stud finder and level are also strongly recommended, even for a simple project.
How do I keep my floating shelf perfectly level?
Mark your mounting points with a pencil, use a level to confirm the line is straight, and double-check before drilling final holes. Many hidden bracket kits also include a template to make this step easier.

Ghani Mejber — Founder & Lead Editor
Ghani Mejber is the founder of DIY Homes Hub. After years of living in compact rentals with strict lease rules and limited storage, I started sharing practical, damage-free home upgrades and basic repair guides built for real budgets. Every project I publish focuses on simple tools, accessible materials, and reversible solutions that protect your security deposit.