Thrifted Furniture Makeover: 15 Easy Ideas for Beginners
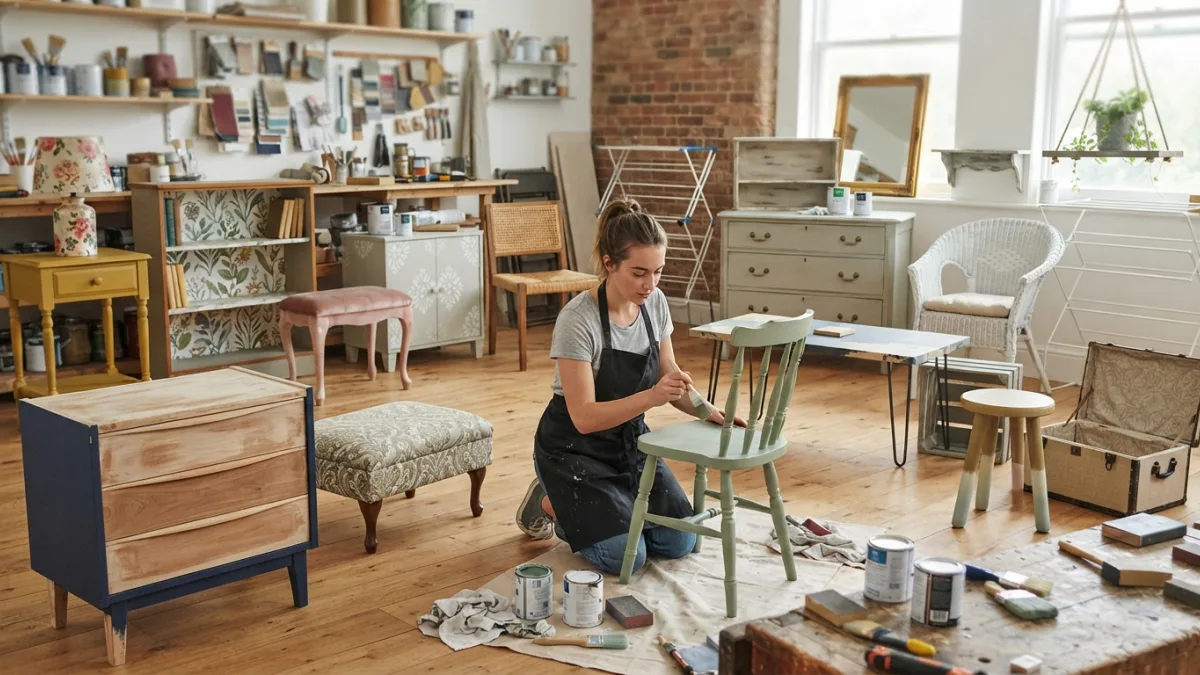
You spot a scratched oak dresser at a church sale, priced less than a sandwich. Most shoppers walk right past it. You see a thrifted furniture makeover waiting to happen. Solid wood, sturdy joints, and a shape you can’t find in most new flat-pack furniture often hide under dull finish and tired hardware, and fixing those problems takes far less skill than you might think.
This guide walks you through the basics first: how to shop, clean, and prepare a piece. Then it gives you 15 beginner-friendly ideas, from a simple coat of paint to cane panels and metallic details. Each one works with basic tools and a small budget. Pick one, start small, and let the first project teach you what you enjoy. If you want to dig deeper, our guide on Update a Rental Bathroom: 7 Easy Tips for a Budget Makeover covers this in more detail.
Start Smart: What to Do Before You Touch a Paintbrush
Thrift Store Shopping Tips That Save Time and Money
Good results start in the store, so check the piece carefully before you pay. Open every drawer and make sure it slides. Push on the corners to see if the frame wobbles, and look underneath for cracks or water stains. Solid wood and sturdy plywood are easier to rework than thin, peeling laminate. Small flaws like scratches, dull finish, and missing knobs are fine, because you will fix them anyway. Deep damage, loose joints, and heavy rot are not worth the trouble for a first project.
Also look closely for signs of pests, especially on upholstered pieces. The U.S. Environmental Protection Agency has a useful overview of bed bugs that explains what to watch for. If anything looks suspicious, leave it in the store.
How to Clean Secondhand Furniture
Before you sand or paint, you need to clean secondhand furniture properly. Years of dust, grease, and furniture polish can stop paint from sticking. Start by vacuuming the surface and the drawers. Then wipe everything down with warm water and a little mild dish soap, using a soft cloth. Kitchen pieces and nightstands often need a second pass to cut through sticky residue. Let the wood dry fully before you move on, because trapped moisture can cause bubbling later.
One safety note: if the piece is very old, its paint might contain lead. Read the EPA’s guidance on lead before you sand, and consider using a test kit first.
How to Remove Musty Furniture Smell
A bad smell can ruin a great find, but you can often remove musty furniture smell with simple household items. Move the piece outside on a dry, sunny day and let fresh air and daylight do some of the work. Wipe the wood with a cloth dampened with a mix of water and white vinegar, then dry it well. Inside drawers, a bowl of baking soda left for a day or two can pull out odors. Cedar blocks or charcoal sachets help afterward.
If you see actual mold, wear a mask and gloves, and think twice. Deep mold damage usually means the piece is not worth saving.
Furniture Makeover Supplies Worth Buying
You do not need a full workshop, but a short list of furniture makeover supplies makes every project smoother. Here is a practical starter kit: This connects closely with another common issue — see Home Office Makeover: 7 Easy Budget Ideas for Small Spaces for more on that.
- Sandpaper in medium and fine grits, plus a sanding block
- A screwdriver and a drill for removing hardware
- Primer, paint, or stain, depending on your plan
- A good synthetic brush and a small foam roller
- Painter’s tape and drop cloths
- Clear sealer or wax for protection
- Gloves, a dust mask, and clean rags
Buy quality brushes. Cheap ones shed bristles and leave streaks that are hard to fix.
15 Easy Ideas for Your First Thrifted Furniture Makeover
Each idea below stands on its own, so you can use one or combine several. Start with the simplest and work up as your confidence grows.
1. Choose the Best Paint for Furniture and Go Solid
A single bold color is the easiest way to transform a tired piece. Look for the best paint for furniture by checking labels: products made for cabinets, trim, or furniture tend to dry hard and resist daily wear. Sand lightly, wipe off the dust, and apply a coat of primer if the wood is dark or glossy. Then paint two thin coats rather than one thick one. Thin coats dry smoother and drip less. Wait for each coat to dry as the can directs, and finish with a clear topcoat on surfaces that get heavy use.
2. Learn Chalk Paint Techniques for a Soft, Vintage Look
Chalk paint is popular with beginners because it sticks to most surfaces with little prep. Some simple chalk paint techniques can give you very different looks. Brush on two coats for a matte, even finish. Or sand the edges and corners gently once dry to create a worn, antique feel. You can also apply a darker wax over the top and wipe it back to add depth. Practice on the back of the piece first. Seal the finish with wax or a clear coat so it holds up.
3. Update Furniture Hardware
New knobs and pulls change a piece’s whole personality in about ten minutes. Try to update furniture hardware before you paint, so you can fill old holes or plan new ones. Measure the distance between screw holes on drawers with two pulls. Buy replacements that match, or pick knobs that need just one hole. Brass gives a warm, classic look. Matte black feels modern. Ceramic knobs add a playful touch. If the old hardware is solid metal, clean it and spray paint it instead of replacing it.
4. Try Wood Stain Refinishing for Natural Beauty
If the wood is real and in good condition, wood stain refinishing can show off its grain instead of hiding it. Strip or sand off the old finish until you reach bare wood, working in the direction of the grain. Wipe away all dust. Test the stain on a hidden spot, because the same color can look different on oak, pine, or maple. Apply the stain with a rag, wipe off the extra, and let it dry. Finish with a protective clear coat. You can read more about how wood stain works if you want the background.
5. Make a Two-Tone Dresser
Why choose between paint and wood when you can use both? Paint the body of the dresser in a muted color and leave the top in natural wood, or restain it a richer shade. The contrast looks intentional and polished. Use painter’s tape for sharp lines where the two finishes meet. This idea is especially good if the top is in better shape than the sides, since you can show it off instead of covering it. Add simple hardware and the whole piece feels designer-made. You might also find our article on Small Kitchen Makeover: 15 Easy No-Renovation Ideas helpful here.
6. Paint Only the Drawer Fronts
Sometimes you only need a pop of color. Keep the frame in its original finish and paint just the drawer fronts in a bright shade like teal, mustard, or deep green. You can even paint each drawer a slightly different tone for an ombre effect. Remove the drawers and lay them flat so the paint dries evenly. This approach is quick, forgiving, and uses very little paint, which makes it perfect if you are nervous about committing to a full makeover.
7. Line the Drawers with Wallpaper or Fabric
Opening a drawer to find a pretty pattern feels like a small surprise. Cut leftover wallpaper, wrapping paper, or thin fabric to fit the bottom of each drawer. Secure it with removable adhesive or spray adhesive, and smooth out any bubbles. Peel-and-stick wallpaper is the easiest for beginners because you can reposition it. This idea also helps cover stains and old smells inside drawers. It costs almost nothing and adds personality where no one expects it.
8. Stencil a Pattern on the Top
A stencil lets you add detail without any drawing skills. Paint the tabletop or dresser top a solid base color and let it dry fully. Then tape the stencil in place and dab paint on with a small sponge or stencil brush, using very little paint to avoid bleeding under the edges. Geometric shapes and simple florals work well. Finish with a few coats of clear sealer, because tops take the most wear. This is a great way to turn a plain coffee table into a statement piece.
9. Swap or Repaint the Legs
Legs shape a piece’s entire look. Chunky, dated legs can make a dresser feel heavy, while slim tapered ones create a mid-century feel. Many thrifted pieces have legs that unscrew, and you can buy replacements in many styles at hardware stores. If new legs are not in your budget, paint the old ones in a contrasting color or a metallic finish. Dipping the ends in a different shade, as if the piece wore little socks, is a fun and easy trick.
10. Reupholster a Seat Cushion
Chairs and stools are ideal first upholstery projects. Unscrew the seat from the frame and remove the old fabric with a flathead screwdriver and pliers. Check the foam; replace it if it feels flat or crumbly. Lay the new fabric face down, place the seat on top, and pull the fabric tight over the edges. Staple it in place, starting in the middle of each side and working toward the corners. Fold the corners neatly, trim extra fabric, and screw the seat back on.
11. Add Cane Webbing Panels
Cane has become a favorite detail on cabinet doors and headboards. If a thrifted piece has a flat wooden panel in a door, you can cut out the center and replace it with cane webbing. Follow the instructions on the webbing you buy, since some types need soaking before installation. Cut it slightly larger than the opening, then secure it with glue and thin trim. The texture adds a relaxed, natural feel that works with many decorating styles.
12. Decoupage a Colorful Surface
Decoupage means gluing paper or fabric to a surface and sealing it so it looks like part of the piece. The craft has a long history, and you can learn about it on this Wikipedia page on decoupage. For furniture, try map pages, sheet music, or patterned napkins on a tabletop or drawer front. Brush decoupage glue on the surface, press the paper down, smooth out wrinkles, and brush another layer on top. Finish with several coats of clear sealer for durability. For a related walkthrough, check out Budget Living Room Makeover: 7 Easy Ideas for a Rich Look.
13. Paint the Back of a Bookcase
A plain bookcase can look expensive with one small change. Remove the shelves if you can, then paint just the back panel a deep, rich color like navy, forest green, or charcoal. You can also cover it with peel-and-stick wallpaper. Books and decor stand out against the darker or patterned background, which gives the shelves depth. Paint the outside a coordinating shade, or keep the original finish if the wood still looks good. It is a low-risk project with a big visual payoff.
14. Add Trim or Decorative Molding
Thin wooden trim and applique pieces can make a flat, boxy cabinet look custom. Cut strips to frame drawer fronts or doors, and glue them in place with wood glue. Hold them with painter’s tape while the glue sets. Once dry, fill any gaps with wood filler, sand smooth, and paint the whole piece in one color. The raised lines catch light and create a classic, paneled look. Measure twice and cut once, and use a miter box if you have never made angled cuts before.
15. Finish with Metallic Accents
Small touches of gold, brass, or copper can lift almost any makeover. Use a metallic paint pen or a thin brush to highlight carved details, drawer edges, or the rims of knobs. Gold leaf pens and wax are also beginner-friendly. Keep it simple: a little shine goes a long way, and too much can look busy. Apply metallics after your main paint has fully dried, and seal them gently so they do not rub off. This last step makes a finished piece look intentional.
Your First Thrifted Furniture Makeover Starts Small
You do not need to tackle a full dining set to learn the ropes. Choose one small piece, like a side table or a chair, and try a single idea from this list. Take your time with prep, because careful cleaning and light sanding matter more than any fancy technique. If something goes wrong, you can usually sand it back and start again. Every thrifted furniture makeover teaches you something, and the second project almost always goes faster and looks better than the first. Keep your eyes open on your next trip to the thrift store.
Frequently Asked Questions
Do I always need to sand before painting thrifted furniture?
Not always, but a light sanding helps paint stick, especially on glossy finishes. Chalk paint and some bonding primers need less prep. Always clean the surface well, whatever paint you choose.
How much does a thrifted furniture makeover usually cost?
It depends on the piece and your plan. A simple project with paint and new knobs can cost much less than buying new furniture. Reusing materials you already own keeps the cost down further.
What is the easiest project for a complete beginner?
Swapping the hardware or painting a small table in one color is the easiest start. Both are quick, need few tools, and give you a clear before-and-after result.
Is it safe to sand old furniture?
Be careful with very old pieces, since their paint may contain lead. Test the paint first and follow official safety guidance before sanding. Wear a dust mask and work in a ventilated space.
How do I protect the finish after painting?
Apply a clear topcoat or wax, depending on your paint type. Tabletops and other high-use surfaces benefit from several thin coats of sealer. Let everything cure fully before you use the piece heavily.

Ghani Mejber — Founder & Lead Editor
Ghani Mejber is the founder of DIY Homes Hub. After years of living in compact rentals with strict lease rules and limited storage, I started sharing practical, damage-free home upgrades and basic repair guides built for real budgets. Every project I publish focuses on simple tools, accessible materials, and reversible solutions that protect your security deposit.