Recaulk a Bathtub With Mold: 7 Easy Steps for Beginners
Black spots along the edge of your tub are easy to ignore, until they spread. If you want to recaulk a bathtub with mold already in the seam, fortunately, you can do it yourself in an afternoon. You don’t need special skills. You need a few cheap tools, some patience, and the right order of steps. Mold grows in caulk because the seam stays damp, collects soap, and rarely dries fully between showers. Once mold sinks into the caulk, surface scrubbing usually won’t solve it. The old bead has to come out, the gap has to be cleaned and dried, and a fresh seal has to go in. This guide walks you through every stage, from prep to the final wait.
Why Mold Grows in Tub Caulk, and When It’s Time to Replace It
Caulk seals the joint where your tub meets the wall or tile, and that joint takes a beating every day. Water, soap scum, and body oils collect there, and mold loves that mix. The EPA’s mold resource page explains that controlling moisture is the key to controlling indoor mold, which is why a constantly damp seam keeps fighting back. Light stains on the surface may wipe away. But if the caulk is cracked, peeling, shrunken, or stained all the way through, cleaning it won’t fix the problem. That’s the moment to recaulk a bathtub instead of scrubbing again. A loose seam can also let water slip behind the tub edge, where it can damage walls and floors over time. Replacing the bead early costs far less than repairing hidden damage. If you want to dig deeper, our guide on Fix a Dripping Faucet: 7 Easy Steps for Beginners Today covers this in more detail.
Before You Start: Safety, Time, and Red Flags
Mold work is simple, but protect yourself first. Open a window or run the bathroom fan, and wear rubber gloves, safety glasses, and a mask. Never mix bleach with ammonia or other cleaners, because the fumes can be dangerous. Set aside a full afternoon for the job, plus a day or so for the new caulk to cure. Check the area as you go. If the wall near the tub feels soft, the grout is crumbling badly, or you see large patches of mold beyond the seam, stop and call a professional. Those signs suggest water has been getting in for a long time. If the trouble is limited to the caulk line, you’re in good shape to continue.
7 Steps to Recaulk a Bathtub With Mold
Follow these seven steps in order, and don’t rush the drying parts. Each one builds on the last.
Step 1: Gather Caulk Removal Tools and Supplies
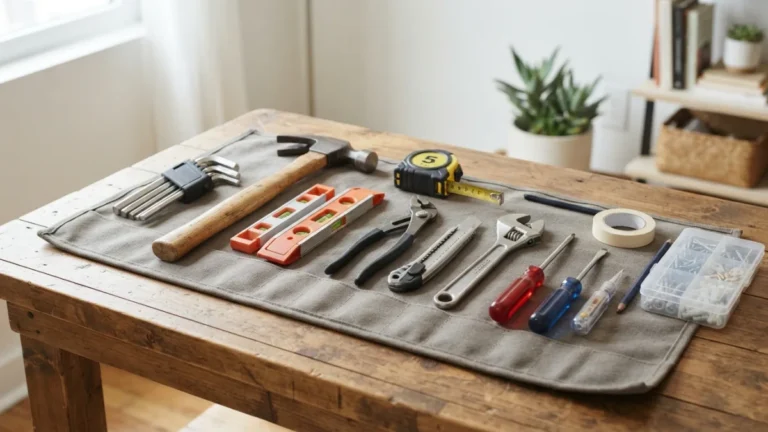
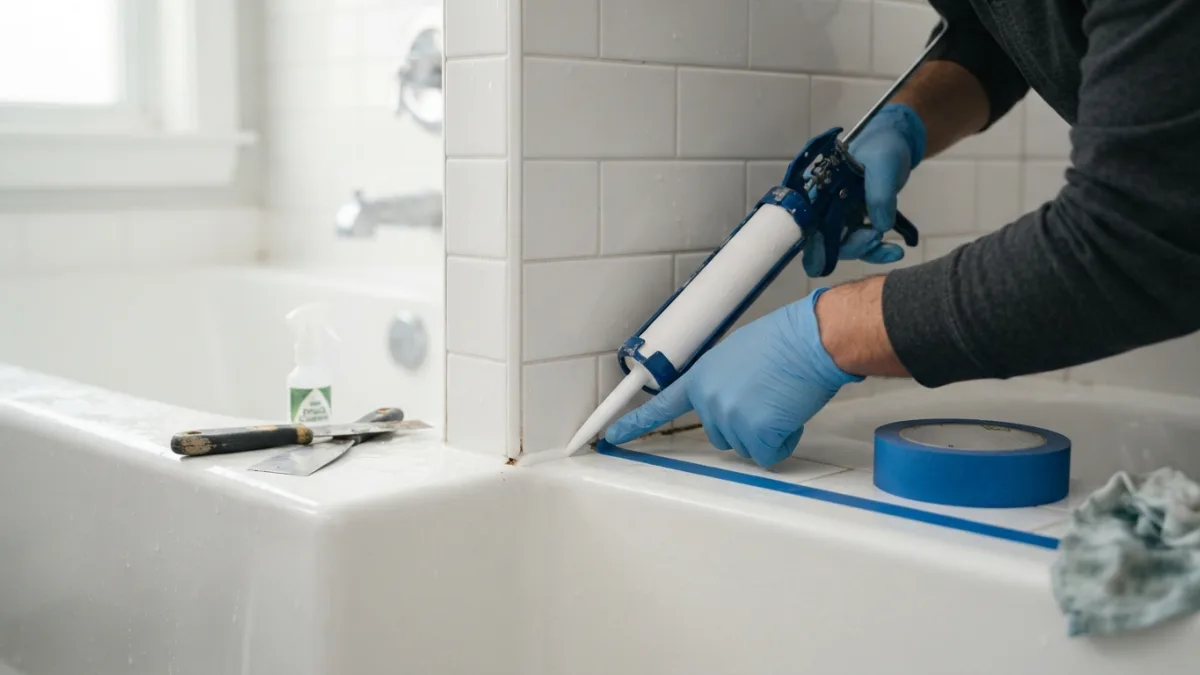
The right caulk removal tools make the job faster and keep your tub from getting scratched. A cheap plastic scraper or a dedicated caulk-removal tool works well, and a utility knife helps with the first cut. Lay everything out before you begin so you aren’t hunting for a rag with wet hands. Here’s a simple checklist:
- Utility knife and plastic scraper or caulk-removal tool
- Painter’s tape
- Stiff brush or old toothbrush
- Mold cleaner or a diluted bleach solution (follow the label)
- Rubbing alcohol and clean rags
- Silicone caulk for kitchens and baths
- Caulk gun
- Gloves, safety glasses, and a mask
Most of this costs very little, and you may own half of it already. This connects closely with another common issue — see Unclog a Drain: 7 Easy Steps Without Calling a Plumber for more on that.
Step 2: Remove Old Caulk Completely
Your first real task is to remove old caulk from the entire seam, not just the ugly parts. Slide the utility knife along the top edge of the bead, then along the bottom edge, keeping the blade angled away from the tub surface. Grab one end of the strip and peel it away. Often it comes off in long pieces, but stubborn bits will need the scraper. Be gentle on acrylic or fiberglass tubs, since metal blades can leave scratches. A caulk softener or silicone remover can help with leftover residue. Follow the product directions and give it time to work. When you finish, the gap should look bare and clean, with no sticky strings or flakes left behind.
Step 3: Clean Mold Before Caulking
You must clean mold before caulking, or the new bead may stick poorly and the stains may return. With the old caulk gone, you’ll often see dark spots on the tub edge, the wall, or the grout. Mix warm water with dish soap and scrub the whole seam using a stiff brush. An old toothbrush reaches tight corners. Wipe away the loosened grime and any caulk crumbs with a damp rag, or pick them out with a vacuum nozzle. Don’t worry if some staining remains at this point. This step is about removing dirt and soap film so the next treatment can reach the mold itself. Work slowly, and wear your mask while you scrub.
Step 4: Kill Bathtub Mold and Dry the Seam
Now it’s time to kill bathtub mold that’s still hiding in the joint. Apply a mold-and-mildew cleaner made for bathrooms, or a diluted bleach solution if the surfaces allow it. Read the label for mixing ratios and wait times, and keep the room ventilated. Let the product sit for the recommended time, then rinse with clean water and wipe the area dry. The next part matters just as much: moisture is what feeds mold. Run a fan, point a hair dryer on low at the gap, or simply wait several hours. Press a dry paper towel into the seam. If it comes out damp, keep drying. Caulk won’t bond properly to a wet surface.
Step 5: Choose the Best Bathtub Caulk and Prep the Gap
For most homes, the best bathtub caulk is 100% silicone labeled for kitchen and bath use, ideally with mildew-resistant additives. Silicone stays flexible, handles water well, and moves with the tub as it shifts. You can read more about how caulk and sealants differ, but for a wet area, check the label for “waterproof” and “mildew resistant.” Avoid paintable latex-only products here. Once you’ve picked your tube, wipe the seam with rubbing alcohol to remove any oily film. Then apply painter’s tape along the wall and along the tub, leaving a narrow, even channel. This gives you crisp lines. If you can, fill the tub with water first so the joint sits at its widest. You might also find our article on Remove a Stripped Screw: 8 Easy Methods That Really Work helpful here.
Step 6: Use Smart Caulk Gun Technique
Good caulk gun technique matters more than speed. Cut the nozzle tip at a 45-degree angle with a small opening, since you can always cut more later. Pierce the inner seal with a nail or the tool built into the gun. Place the tip at the corner, squeeze the trigger with steady pressure, and move along the seam at an even pace so the bead stays consistent. Push the caulk into the gap rather than just laying it on top. Next, smooth the bead with a caulk tool or a gloved finger dipped in soapy water. Pull off the tape right away, while the caulk is still wet, lifting it away from the seam slowly.
Step 7: Respect the Caulk Drying Time
Even after a perfect job, caulk drying time decides whether your seal lasts. Many silicone products feel dry on the surface within an hour or so, but they usually need much longer to cure fully. Many labels call for about 24 hours before water touches the seam, though yours may differ, so check the tube. Keep the bathroom door open and the fan running, and skip showers until the time is up. If you must use the tub, wash somewhere else. When the cure is done, run your finger along the bead. It should feel firm and smooth, with no gaps or thin spots. Fix small flaws with a touch-up before they turn into leaks. Patience here pays off for years.
How to Prevent Mold Regrowth After You Recaulk a Bathtub
To prevent mold regrowth, keep the new seam as dry as you can. Fresh caulk resists mildew, but it isn’t invincible. A few small habits make a big difference:
- Run the exhaust fan during showers and for 20 to 30 minutes afterward.
- Squeegee or wipe the tub edge and walls after use.
- Clean the seam every week or two with a mild bathroom cleaner.
- Fix drips and leaks quickly.
- Leave the shower curtain open so it dries fully.
Check the bead a couple of times a year for cracks or gaps. Catching a small problem early means you can touch it up instead of starting over. For a related walkthrough, check out Adjust Cabinet Hinges: 5 Easy Steps for Even Doors.
Final Thoughts
Replacing a moldy seal feels like a big job, but it breaks down into small, manageable tasks. Cut out the old bead, clean and dry the gap, apply new silicone, and give it time to cure. If you stay patient, you can recaulk a bathtub and get a tidy, watertight finish without hiring anyone. Keep the room ventilated, and the new seam should stay clean far longer than the last one.
Frequently Asked Questions
Can I put new caulk over moldy caulk?
No. New caulk won’t bond well to old, dirty caulk, and mold can keep growing underneath. Remove the old bead fully, clean the gap, and let it dry first.
How long does it take to recaulk a bathtub?
Most beginners need two to four hours for removal, cleaning, and application. The curing wait comes on top of that, often about a day, so check the tube.
Is silicone or acrylic caulk better for a tub?
Silicone is usually the safer pick for tubs because it stays flexible and handles constant moisture. Look for a product labeled for kitchen and bath use.
How often should I replace bathtub caulk?
There’s no fixed schedule. Replace it when you see cracks, gaps, peeling, or mold that won’t wipe away. Good ventilation and regular cleaning help it last longer.
When should I wait before taking a shower?
Follow the manufacturer’s instructions on the tube. Many products suggest waiting around 24 hours, since caulk drying time can change with humidity and temperature.

Ghani Mejber — Founder & Lead Editor
Ghani Mejber is the founder of DIY Homes Hub. After years of living in compact rentals with strict lease rules and limited storage, I started sharing practical, damage-free home upgrades and basic repair guides built for real budgets. Every project I publish focuses on simple tools, accessible materials, and reversible solutions that protect your security deposit.