Remove a Stripped Screw: 8 Easy Methods That Really Work
You lean into the screwdriver, turn it, and feel the tip spin uselessly in the head. Now you need to remove a stripped screw, and the job just got a lot more annoying. Take a breath before you grab a hammer. Most stripped screws come out with simple tools and a little patience, and you probably own half of what you need already.
This guide walks through eight methods, ordered from the easiest to the most aggressive. Start at the top. Move down the list only if a method fails. If you want to dig deeper, our guide on Find a Wall Stud: 7 Easy Tricks Without a Stud Finder covers this in more detail.
Quick Guide: Which Method Fits Your Screw?
Different stripped screws need different fixes. A screw with a barely chewed head is a very different problem from a rusted bolt buried in metal. Use this table to jump to the method that matches your situation.
| Method | Best For | Effort Level |
|---|---|---|
| 1. Rubber band | Slightly stripped heads | Very low |
| 2. Different bit | Chewed Phillips heads | Low |
| 3. Cut a new slot | Heads sitting above the surface | Medium |
| 4. Pliers | Screws in wood with raised heads | Low |
| 5. Extractor kit | Badly stripped heads | Medium |
| 6. Drilling off the head | Last-resort removal | High |
| 7. Torx bit or extractor | Rounded hex sockets | Medium |
| 8. Oil and heat | Rusted or seized screws | Medium |
Before You Start: Set Yourself Up to Win
A few minutes of prep saves you from making the damage worse. First, check the head. Is it stripped, or is the screw just stuck? Then look at the surface around it. If it’s a finished piece of furniture, a car part, or an appliance, you’ll want to work gently.
Stop turning the moment the driver slips. Every extra spin grinds away more metal. Wear safety glasses, too, because metal shavings and broken bit fragments can fly. The U.S. Occupational Safety and Health Administration explains why in its guidance on eye and face protection. Finally, good light and a steady surface make a surprising difference.
Method 1: Try the Rubber Band Screw Trick
The rubber band screw trick is the cheapest fix there is, and it works best when the head is only slightly damaged. Grab a wide, flat rubber band. A thicker one gives you more material to fill the worn grooves.
- Lay the rubber band flat over the screw head.
- Press your screwdriver firmly through the band and into the head.
- Turn slowly counterclockwise while pushing down hard.
The rubber fills the gaps between the driver and the damaged slots, which gives the tip something to grip. Push harder than you think you need to. If the band tears or the driver keeps slipping, move on to the next method.
Method 2: Fix a Stripped Phillips Head With a Better Bit
A stripped Phillips head often responds to a simple change of tools. Try a bit one size larger or smaller, because a different fit can catch what is left of the cross-shaped slot. A new, sharp bit grips much better than a worn one. If you’re curious why this drive type slips so easily, Wikipedia’s list of screw drives shows how different designs compare.
Still no luck? Try a Torx or flathead bit and tap it gently into the damaged head with a hammer. The bit cuts its own grip into the metal. Keep firm downward pressure as you turn, and go slowly. A drill on its lowest speed can help, but hand turning gives you more control. This connects closely with another common issue — see Adjust Cabinet Hinges: 5 Easy Steps for Even Doors for more on that.
Method 3: Cut a New Slot to Remove a Stripped Screw
When the head sits above the surface, you can remove a stripped screw by turning it into a flathead screw. Use a rotary tool with a cutoff wheel, or a hacksaw, to cut a straight groove across the head. Make it deep enough for a flathead screwdriver to bite, but don’t cut into the material underneath.
Clamp or hold the workpiece firmly, and wear eye protection. Once the slot is ready, choose a flathead driver that fits snugly. Press down hard and turn counterclockwise. This method is quick and cheap if you already own a rotary tool. It also leaves the screw’s threads untouched, so the hole stays in good shape.
Method 4: Stripped Screw in Wood? Grab the Head With Pliers
A stripped screw in wood is often easier to rescue than one in metal, because wood is soft and easy to work around. If any part of the head sticks out, clamp locking pliers tightly around it. Squeeze hard, then turn counterclockwise with slow, steady force. Needle-nose pliers can work for smaller screws.
What if the head is flush with the surface? Use a small chisel or a sharp utility knife to carefully cut away a little wood around the head. That exposes enough metal for the pliers to grab. Work gently so you don’t splinter visible surfaces. You can fill the small gap with wood filler afterward.
Method 5: Use a Screw Extractor Kit
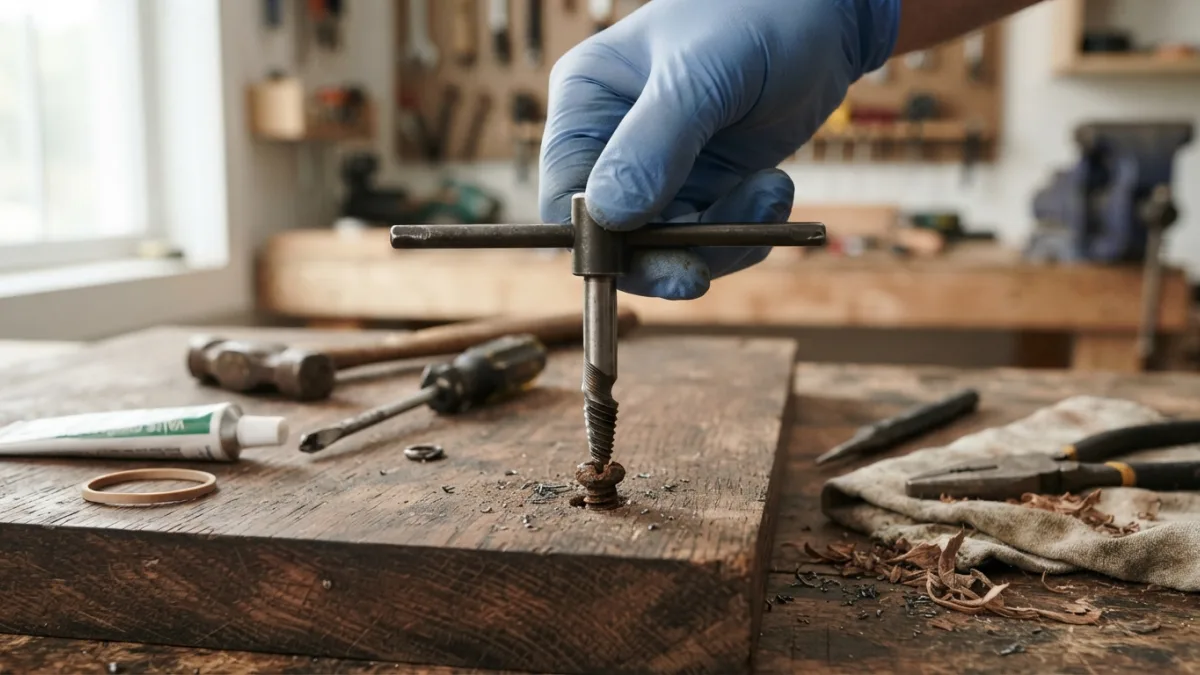
A screw extractor kit is the tool made for exactly this problem, and it’s worth owning if you work on projects often. These kits include reverse-threaded bits. As you turn them counterclockwise, they bite into the screw and pull it out. You can read more about how they work on Wikipedia’s screw extractor page.
- Make a small dimple in the center of the head with a center punch.
- Drill a shallow pilot hole into the head with the kit’s drill bit.
- Tap the extractor into the hole.
- Turn it counterclockwise with a wrench or drill set to reverse.
Go slowly. Extractor bits are hard but brittle, and they can snap if you force them.
Method 6: Drill Out Screw Head When Nothing Else Works
Sometimes the best plan is to drill out screw head material until the head simply separates from the shaft. Pick a drill bit about the same size as the screw’s shaft. Place the tip at the center of the head and drill slowly with steady pressure. A center punch mark helps keep the bit from wandering. You might also find our article on Fix a Dripping Faucet: 7 Easy Steps for Beginners Today helpful here.
When the head pops off, the object it was holding comes loose. You can then lift it away and grip the leftover shaft with pliers. Turn it out by hand. This method destroys the screw, so treat it as a final option. Still, it works on almost any stripped screw, and it’s often the cleanest way out of a truly stubborn one.
Method 7: Stripped Allen Bolt Removal With a Torx Bit
For stripped Allen bolt removal, the hex socket usually rounds out because the key was too small or worn. A good trick is to tap a Torx bit into the damaged socket with a light hammer. Torx bits have six lobes, so they wedge into a rounded hex and grip tightly. Choose one that fits snugly, then turn it with a ratchet or wrench.
If that fails, use a hex-style extractor, or cut a slot across the bolt head as in Method 3. Add a drop of penetrating oil if the bolt feels seized. Apply steady pressure and avoid sudden jerks, which can round the socket even more.
Method 8: Rusted Stuck Screw Removal With Oil and Heat
Rusted stuck screw removal takes patience more than muscle. Spray a penetrating oil around the screw and wait. Longer is better, and some stubborn screws need hours or an overnight soak. Tap the head lightly with a hammer to help the oil work into the threads. Then try your driver again.
If the screw still won’t budge, heat can help. A heat gun warms the surrounding metal, which expands slightly and loosens rust. Keep heat away from plastic, wiring, fuel, and anything flammable. An impact driver is another good option, because its sudden twisting force can break a rusted bond. Combine any of these with a better-fitting bit or an extractor for the best chance.
How to Prevent Stripped Screws Next Time
It’s much easier to prevent stripped screws than to fix them. Most stripping comes down to a few simple habits:
- Match the bit to the screw. A bit that wobbles in the head will strip it.
- Push firmly. Keep steady pressure straight into the screw as you turn.
- Slow down. High drill speeds can chew up a head in seconds.
- Use the clutch. Set your drill to a lower torque setting.
- Drill pilot holes. They reduce resistance, especially in hardwood.
- Replace worn bits. A rounded tip is a stripped screw waiting to happen.
Quality screws help too, since cheap ones often have soft heads. For a related walkthrough, check out Fix a Running Toilet: 5 Easy Causes and Simple Repairs.
Final Thoughts on How to Remove a Stripped Screw
Knowing how to remove a stripped screw takes the panic out of a frustrating moment. Start with the gentle options, like a rubber band or a better-fitting bit. Move up to pliers, a new slot, or an extractor if the screw fights back. Keep drilling and heat for the toughest cases.
Whatever you pick, work slowly and keep your pressure firm. Rushing is how screws get stripped in the first place. With the right method and a little patience, you can free almost any stubborn screw and get your project back on track.
FAQ: Removing Stripped Screws
What is the easiest way to remove a stripped screw?
The rubber band method is the easiest. Place a wide rubber band over the head, press your screwdriver into it, and turn slowly. It works best when the head is only lightly damaged.
Can I remove a stripped screw without special tools?
Yes. A rubber band, a different screwdriver bit, or a pair of locking pliers can all work. If the head is raised, you can also cut a slot with a hacksaw and use a flathead screwdriver.
Should I use a drill to remove a stripped screw?
Use a drill only after gentler methods fail. A drill with an extractor bit in reverse can pull the screw out. You can also drill off the head. Keep the speed low and the bit centered.
How do I remove a stripped screw that is also rusted?
Soak it in penetrating oil and give the oil time to work. Tap the head lightly, then try a tight-fitting bit or an extractor. Gentle heat from a heat gun can also loosen rust, but keep it away from anything flammable.
Why do screws strip so easily?
Screws usually strip when the bit doesn’t fit, when you don’t push hard enough, or when you drive at too high a speed. Worn bits and soft, low-quality screws make the problem worse.

Ghani Mejber — Founder & Lead Editor
Ghani Mejber is the founder of DIY Homes Hub. After years of living in compact rentals with strict lease rules and limited storage, I started sharing practical, damage-free home upgrades and basic repair guides built for real budgets. Every project I publish focuses on simple tools, accessible materials, and reversible solutions that protect your security deposit.