Removable Wallpaper: 7 Easy Steps to Avoid Mistakes
Redecorating a rental or testing a bold pattern used to mean either committing to permanent glue or living with plain white walls forever. Removable wallpaper changed that equation. It lets you experiment with color, texture, and pattern without the commitment of traditional paste, and it has become one of the most popular home-decor trends for renters, homeowners who like to switch things up, and anyone who wants a quick weekend refresh. But “removable” doesn’t automatically mean “foolproof.” Plenty of people end up with peeling corners, bubbled seams, or damaged drywall because they skipped a step or rushed the process.
Fortunately, getting a clean, professional-looking result isn’t complicated once you understand how this material actually works. Most removable wallpaper today falls into the category of peel and stick wallpaper, which uses a repositionable adhesive backing instead of wet paste. That adhesive is designed to grip firmly enough to stay put for months or years, yet release cleanly when you’re ready for a change. The key word is “designed”—which means the outcome depends heavily on how you prepare, apply, and eventually remove it. Below are seven practical steps that will help you avoid the most common mistakes people make with temporary wallpaper. If you want to dig deeper, our guide on Peel and Stick Backsplash: 5 Easy Before-and-After Tips covers this in more detail.
Step 1: Choose the Right Removable Wallpaper for Your Wall
Not all removable wallpaper is created equal, and picking the wrong type for your space is often where problems start. Vinyl-based peel and stick options tend to be durable and easy to wipe down, making them a solid choice for kitchens or bathrooms, while fabric-backed versions often feel more breathable and forgiving on textured walls. Check the product description for guidance on the surfaces it works best with, since some adhesives struggle on high-gloss paint, unprimed drywall, or walls with heavy texture. If you live somewhere humid, look for a wallpaper rated for moisture resistance. Reading a handful of real customer reviews about how the paper behaved during removal can save you from a disappointing surprise later.
Step 2: Get Wall Preparation for Wallpaper Right from the Start
Wall preparation for wallpaper is the step people skip most often, and it’s usually the reason adhesive fails. Start by cleaning the wall with a mild soap and water solution to remove dust, grease, and cooking residue, then let it dry completely. Fresh paint needs time to cure fully before wallpaper goes on top; most manufacturers recommend waiting at least three to four weeks after painting, since curing paint releases moisture and chemicals that can interfere with adhesion. Fill in any nail holes, cracks, or dents with spackle and sand them smooth, because bumps and gaps will show through the paper and create weak spots where it can lift. A smooth, clean, fully dry surface is the single biggest factor in how well removable wallpaper performs.
Step 3: Test a Small Patch Before Committing
Even with a reputable brand, wall surfaces vary enough that a small test is worth the extra ten minutes. Cut a small square from a leftover corner of the wallpaper roll and stick it to an inconspicuous section of the wall, such as behind a door or inside a closet. Leave it there for at least 24 hours, then gently try to peel it back. If it comes off cleanly without pulling paint or leaving residue, you’re likely in good shape. If it tears the paint or leaves adhesive behind, that’s a sign your wall needs more prep, a different primer, or possibly a different wallpaper product altogether. This single test can prevent a much bigger headache across an entire room. This connects closely with another common issue — see Kitchen With No Pantry: 7 Easy Organizing Tips to Try for more on that.
Step 4: Measure, Cut, and Plan Your Pattern
Rushing the measuring stage is one of the fastest ways to waste material and end up with mismatched seams. Measure the height of your wall from baseboard to ceiling, then add a few extra inches to each strip to allow for trimming and pattern matching. Lay out your strips in order before you start applying anything, especially if the pattern needs to align across seams, since removable wallpaper with a repeating design requires careful planning to avoid an obvious break in the pattern. Use a level or a plumb line to mark a straight vertical guide on the wall before hanging your first strip, because even a slightly crooked start becomes very noticeable by the time you reach the far end of the wall.
Step 5: Apply Removable Wallpaper the Right Way
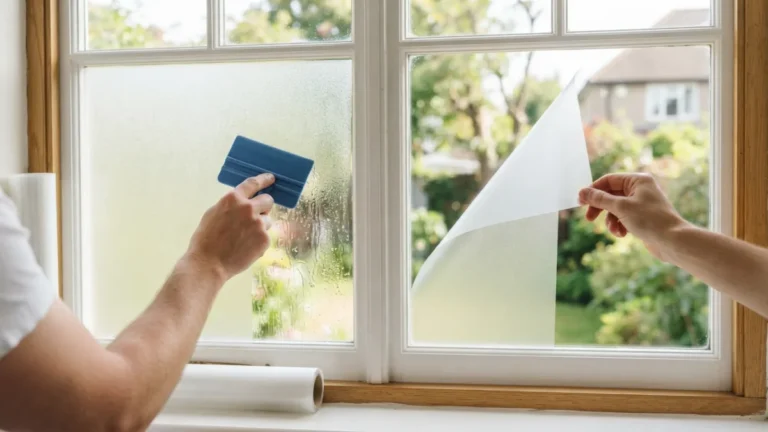
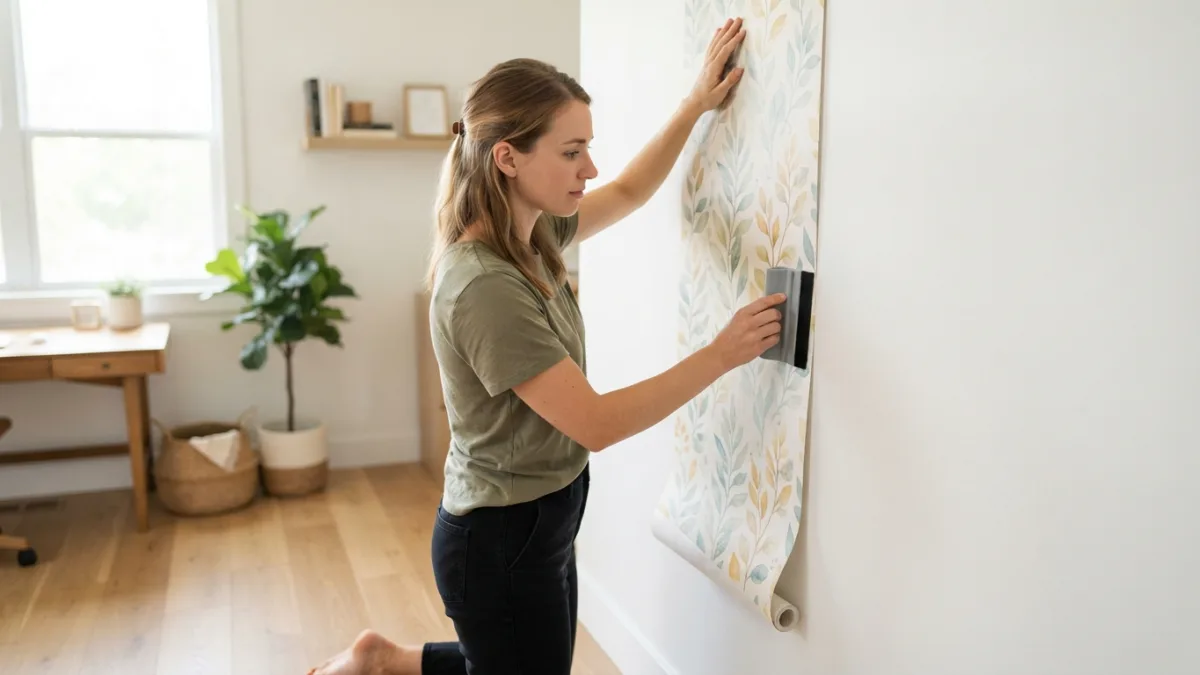
When you’re ready to apply removable wallpaper, work slowly and in sections rather than trying to unroll an entire strip at once. Peel back a small portion of the backing, line up the top edge with your guide mark, and press it into place before continuing to peel and stick down the rest of the strip. A smoothing tool, or even a clean, dry cloth wrapped around a plastic scraper, helps push out air pockets as you go. For corners, cut the paper slightly and overlap it rather than trying to force one continuous piece around a bend. Working with a helper makes this step considerably easier on longer walls, since one person can guide the strip while the other smooths it into position.
Step 6: Smooth Out Bubbles and Seams Carefully
Air bubbles are almost inevitable, but they’re easy to fix if you catch them early. Use a plastic smoothing tool or a credit card wrapped in cloth to push bubbles toward the nearest edge, working from the center outward. For seams, aim for a slight overlap rather than a tight butt joint, since removable wallpaper can shrink very slightly over time, and a gap at the seam is far more noticeable than a small overlap. If a stubborn bubble refuses to flatten, a pin can release trapped air without leaving a visible mark, though this should be a last resort rather than a routine fix. Trim excess paper at the baseboard and ceiling with a sharp utility knife for a crisp, finished edge. You might also find our article on 10 Renter-Friendly Upgrades That Won't Cost Your Deposit helpful here.
Step 7: Remove Removable Wallpaper Without Damage
Removing wallpaper without damage comes down to patience more than technique. Start at a corner and pull back slowly at a low angle, close to the wall rather than straight out, which reduces the strain on the paint underneath. If a section resists, a hair dryer on a low heat setting held a few inches away can soften the adhesive and make it easier to lift. Avoid yanking quickly, since a fast pull is far more likely to take a layer of paint with it. According to general guidance from the Environmental Protection Agency on renovation safety, it’s also worth being cautious when removing any wall covering in older homes, since disturbing old paint layers can release lead dust if the underlying paint predates 1978. Once the paper is off, a gentle wipe with warm water removes any leftover adhesive residue.
Removable wallpaper has come a long way from the flimsy contact-paper designs of decades past, and understanding its history helps explain why today’s versions perform so much better; the concept of decorative wall coverings itself stretches back centuries, as outlined in this overview of the history of wallpaper. Modern adhesive technology is what finally made a truly temporary version practical for everyday homes and apartments. Knowing that background can also help set realistic expectations: even the best peel and stick wallpaper is a manufactured product with limits, not a magic fix that works on every surface in every condition.
A few extra habits make a noticeable difference in the long run. Keep the room at a stable, moderate temperature while the wallpaper settles, since extreme heat or cold can affect how well the adhesive bonds. Avoid touching or repositioning strips too much once they’re placed, since repeated peeling and resticking weakens the adhesive over time. If you plan to remove the wallpaper eventually, doing so within the timeframe listed by the manufacturer, often one to three years, gives you the best chance of a clean release. Store leftover rolls in a cool, dry place in case you need to patch a section later, since color can shift slightly with age and sun exposure. For a related walkthrough, check out Budget Living Room Makeover: 7 Easy Ideas for a Rich Look.
Removable wallpaper offers a rare combination in home decor: it’s flexible enough for renters and commitment-phobic decorators, yet polished enough to look completely intentional when done well. The difference between a stunning accent wall and a peeling, uneven mess almost always comes down to preparation and patience rather than the product itself. Take the time to clean and prime your walls, test a small patch, measure carefully, and apply each strip with steady hands, and the results can rival wallpaper installed with traditional paste. When it’s time for a change, removing it slowly and at the right angle protects both your walls and your paint job, leaving you free to redecorate again whenever the mood strikes.
Frequently Asked Questions About Removable Wallpaper
Does removable wallpaper really come off without damaging paint?
In most cases, yes, as long as the wall was properly prepared and the paint had fully cured before the wallpaper went up. Peeling slowly at a low angle and using gentle heat if needed further reduces the risk of pulling up paint.
How long does removable wallpaper typically last on a wall?
Most peel and stick wallpaper is designed to stay in place for one to three years, though this varies by brand, wall surface, and room conditions like humidity and sunlight exposure.
Can I use removable wallpaper over textured walls?
It’s possible on lightly textured surfaces, but heavily textured walls make it harder for the adhesive to grip evenly, which can lead to bubbling or premature peeling. A smoother wall almost always gives better results.
What’s the best way to store leftover wallpaper for future repairs?
Keep leftover rolls flat or loosely rolled in a cool, dry area away from direct sunlight, ideally in their original packaging, so the color and adhesive stay consistent if you need to patch a section later.
Is removable wallpaper a good option for rental apartments?
Yes, it’s one of the main reasons the product became so popular. It allows renters to personalize a space without violating lease terms that typically prohibit permanent alterations, as long as it’s removed carefully when moving out.

Ghani Mejber — Founder & Lead Editor
Ghani Mejber is the founder of DIY Homes Hub. After years of living in compact rentals with strict lease rules and limited storage, I started sharing practical, damage-free home upgrades and basic repair guides built for real budgets. Every project I publish focuses on simple tools, accessible materials, and reversible solutions that protect your security deposit.