Cover Ugly Countertops: 7 Easy Ways to Avoid Replacement
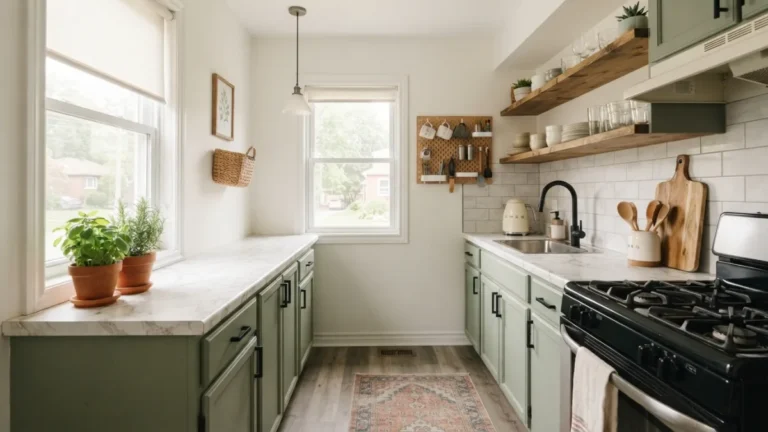
Staring at a countertop that stops you in your tracks every time you walk into the kitchen? You are not alone. Old laminate, dated tile, or a color that hasn’t been fashionable since the Clinton administration can make an otherwise nice kitchen feel tired. Fortunately, you don’t need a contractor, a demolition crew, or a second mortgage to fix it. There are plenty of ways to cover ugly countertops that cost a fraction of a full replacement and can often be done in a single weekend.
Full countertop replacement typically runs into the thousands of dollars once you factor in materials, labor, plumbing disconnection, and disposal fees. For renters, that option is off the table entirely, since landlords rarely approve permanent renovations. Fortunately, homeowners and renters alike have several affordable, low-commitment paths to a fresher-looking kitchen. Below are seven practical methods, ranging from a few dollars in supplies to a modest weekend project, that let you transform the look of your counters without tearing anything out. If you want to dig deeper, our guide on Update a Rental Bathroom: 7 Easy Tips for a Budget Makeover covers this in more detail.
Why Consider a Budget Countertop Makeover First
Before you call a contractor, it makes sense to try a budget countertop makeover and see how far it gets you. Many homeowners assume ugly counters mean an automatic replacement, but that’s rarely the only option. A well-planned makeover can buy you years of a better-looking kitchen while you save for a permanent upgrade, or it can simply be the long-term solution if the counters are structurally sound. According to general guidance from Wikipedia’s overview of countertop materials, surfaces like laminate and tile are common in older homes and are often in fine structural shape even when they look dated, which makes them ideal candidates for a cosmetic refresh rather than a rip-out.
1. Countertop Contact Paper
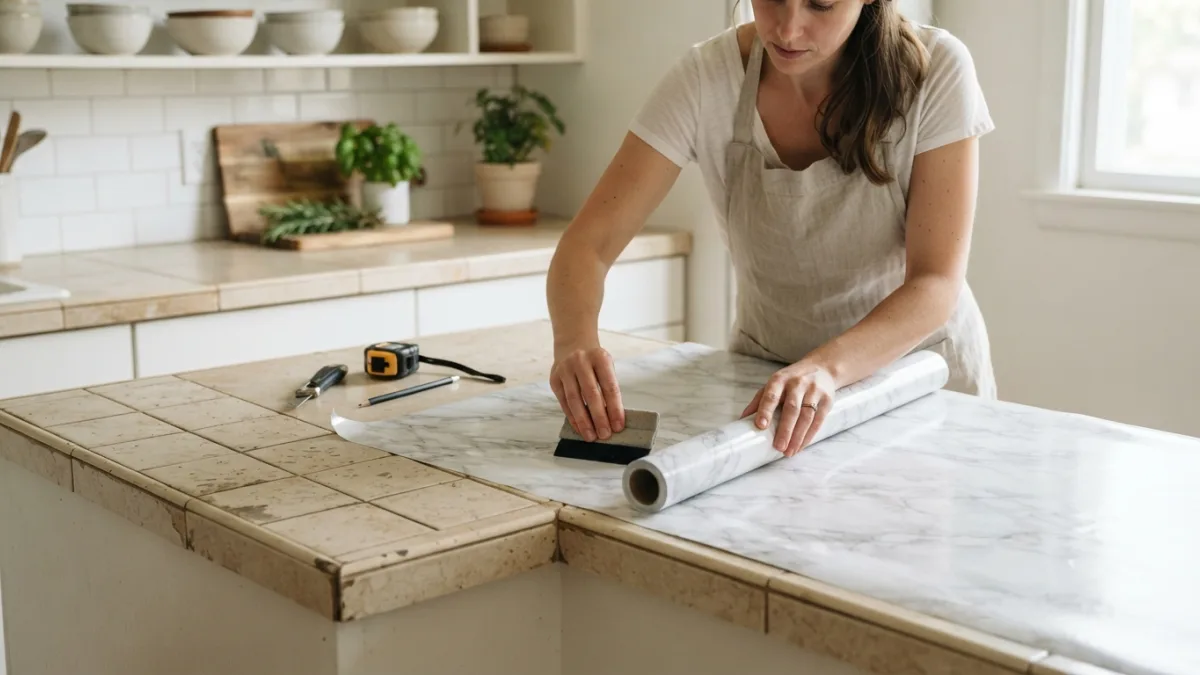
Countertop contact paper is probably the fastest and cheapest fix on this list. It’s a self-adhesive vinyl film that comes in dozens of patterns, including convincing marble, granite, and wood-grain designs. You simply clean the surface, measure and cut the paper to size, then peel and press it into place, smoothing out bubbles with a squeegee or credit card as you go. It won’t hold up to hot pans or heavy knife work directly on the surface, but for a rental kitchen or a quick refresh before selling a house, it delivers a surprising amount of visual impact for around twenty to forty dollars.
- Best for renters and short-term fixes
- Extremely low cost and no tools required
- Not heat or scratch resistant, so use cutting boards and trivets
2. Peel and Stick Countertops
Peel and stick countertops take the contact paper idea a step further with thicker, more durable materials designed specifically for kitchen and bathroom surfaces. These products often include a textured finish that mimics stone more convincingly and can handle a bit more daily wear than basic contact paper. Installation follows a similar process: clean, measure, cut, and apply, though thicker peel and stick sheets are less forgiving of mistakes since repositioning them is trickier. They’re a solid middle-ground choice if you want something that looks more premium than contact paper but still costs well under a hundred dollars for an average kitchen. This connects closely with another common issue — see Budget Living Room Makeover: 7 Easy Ideas for a Rich Look for more on that.
3. Countertop Paint Kits
Countertop paint kits have become one of the most popular ways to cover ugly countertops because they can genuinely transform laminate or old tile into something resembling granite or marble. These kits usually include a primer, a base coat, decorative color flecks or a marbling technique, and a protective topcoat, all sold as a single package. The process takes a few days since each layer needs time to cure, but the result is a hard, durable surface that can survive daily kitchen use far better than contact paper. If your home was built before 1978, check for lead paint before sanding any existing surface, following the safety steps outlined by the EPA’s renovation and painting guidelines.
Tips for a Smooth Paint Job
- Sand and degrease the surface thoroughly before priming
- Apply thin, even coats rather than one thick layer
- Let the topcoat cure fully, often 48 to 72 hours, before using the counter
4. Temporary Countertop Covers
Temporary countertop covers are perfect if you want zero commitment, especially in a rental where you might move again in a year. These are essentially fitted mats or rigid inserts, often made from silicone, cork, or thin butcher block, that simply sit on top of the existing counter without any adhesive or permanent installation. You can lift them off in seconds to clean underneath or take them with you when you move. They won’t disguise every inch of an ugly counter since edges may still peek through, but for kitchen islands or smaller sections, they offer an instant, no-mess update.
5. DIY Countertop Resurfacing
DIY countertop resurfacing usually means applying a self-leveling epoxy coating directly over your existing counters, creating a thick, glossy, stone-like surface once it cures. Unlike paint kits, epoxy resurfacing kits build an actual new layer on top of the counter, which makes them more forgiving of small chips, seams, or uneven spots in the original surface. The process involves taping off edges, pouring the mixed epoxy, and using a heat gun to pop air bubbles before it sets. Curing time can take a few days to a week depending on the product, and you can learn more about how these materials behave from the general Wikipedia entry on epoxy. Ventilation matters here, since the fumes during application can be strong. You might also find our article on Peel and Stick Backsplash: 5 Easy Before-and-After Tips helpful here.
6. Countertop Overlay Options
Countertop overlay options sit between a full replacement and a surface treatment, since they involve installing a thin layer of new material, often quartz, laminate, or solid surface, directly over your existing counter. A professional typically templates your kitchen, cuts the overlay to fit, and adheres it in place without removing the old counter or disturbing your sink and plumbing connections. This route costs more than paint or contact paper but considerably less than a full teardown and replacement, and it gives you a genuinely new, durable surface. It’s worth getting a quote if your budget stretches a bit further than the cosmetic fixes on this list.
| Method | Typical Cost | Durability | Best For |
|---|---|---|---|
| Contact paper | $20–$40 | Low | Renters, quick fixes |
| Peel and stick sheets | $50–$100 | Low to moderate | Short-term upgrade |
| Paint kits | $50–$150 | Moderate | Homeowners on a budget |
| Temporary covers | $30–$100 | Low (removable) | Rentals, islands |
| Epoxy resurfacing | $150–$400 | High | DIY-savvy homeowners |
| Overlays | $1,000–$3,000 | Very high | Bigger budgets, longer term |
7. Removable Countertop Solutions
Removable countertop solutions round out this list for anyone who wants flexibility above all else. Think butcher block inserts cut to size, tension-fit panels, or even large custom cutting boards that cover the ugliest section of counter near the stove or sink. These don’t require adhesive, don’t damage the surface underneath, and can be swapped out or removed entirely whenever you like. They work especially well for covering just the worst spot on a counter, like a burn mark or deep stain, without committing to redoing the whole kitchen. Combined with one of the other methods above, they can round out a complete, low-cost transformation.
Choosing the Right Method for Your Kitchen
The best way to cover ugly countertops depends on how long you plan to stay in your home, how much wear your kitchen sees daily, and how much you’re willing to spend. Renters and short-term homeowners usually do best with contact paper, temporary covers, or peel and stick sheets, since none of these require permanent changes. Homeowners planning to stay put for years often get more value from paint kits or epoxy resurfacing, since both create a harder, longer-lasting finish. If your budget allows for it and you want something closer to a real material change, overlays offer a middle path before committing to full replacement. Whichever route you pick, cleaning and prepping the surface properly makes the biggest difference in how long the final result lasts. For a related walkthrough, check out Small Bedroom Makeover: 7 Easy Steps to Save Under 0.
Frequently Asked Questions
How long do peel and stick countertop covers usually last?
With careful use and avoiding direct heat or sharp knives on the surface, peel and stick covers typically last one to three years before edges start to lift or the pattern shows wear.
Can I put hot pots directly on a painted or resurfaced countertop?
Epoxy resurfacing can handle brief contact with warm items better than paint alone, but it’s still safer to use trivets, since extreme heat can discolor or damage most cosmetic finishes.
Do these methods work on tile countertops, not just laminate?
Yes, most options here, including paint kits and epoxy resurfacing, work well over tile as long as the grout lines are filled or leveled first so the new surface sits flat.
Will covering my countertops affect my home’s resale value?
A tasteful, well-executed cosmetic update can help a kitchen show better to buyers, though it won’t add the same value as a genuine countertop replacement, so treat it as a staging improvement rather than a long-term investment.
Is it safe to do this myself, or should I hire a professional?
Contact paper, peel and stick sheets, and temporary covers are simple enough for most DIYers, while epoxy resurfacing and overlays benefit from some hands-on experience or professional installation for the smoothest results.

Ghani Mejber — Founder & Lead Editor
Ghani Mejber is the founder of DIY Homes Hub. After years of living in compact rentals with strict lease rules and limited storage, I started sharing practical, damage-free home upgrades and basic repair guides built for real budgets. Every project I publish focuses on simple tools, accessible materials, and reversible solutions that protect your security deposit.