Adjust Cabinet Hinges: 5 Easy Steps for Even Doors
A cabinet door that hangs slightly crooked can drive you a little crazy. You notice it every time you reach for a mug. The fix is simpler than most people expect: you can adjust cabinet hinges with one screwdriver and about ten minutes, and you rarely need to take the door off. Hinges loosen over time because doors swing open and shut again and again, and wood can swell or shrink with the seasons. The result is a door that sags, rubs the frame, or leaves a wider gap on one side. This guide covers five easy steps that work for most modern kitchen and bathroom cabinets, plus troubleshooting tips for stubborn doors.
Know Your Hinge First: Inset Cabinet Hinge Types
Inset cabinet hinge types matter because inset doors sit inside the cabinet frame instead of covering it. The look is clean, but the door leaves a thin gap on all four sides, and every flaw shows. Overlay doors, which cover part or all of the frame, hide small errors much better. Most modern cabinets use concealed hinges, also called European or Euro hinges. You can spot them by the metal cup set into the back of the door and the arm that clips onto a plate inside the cabinet. Older or traditional inset doors often use visible butt hinges, which have two leaves joined by a pin. You can read more about how hinges work in general. For our purposes, the key difference is that concealed hinges have built-in adjustment screws, while butt hinges are usually fixed with tighter screws or thin shims. This guide focuses on the concealed kind. If you want to dig deeper, our guide on Squeaky Door or Cabinet: 5 Easy Fixes to Try Today covers this in more detail.
What You Need Before You Start
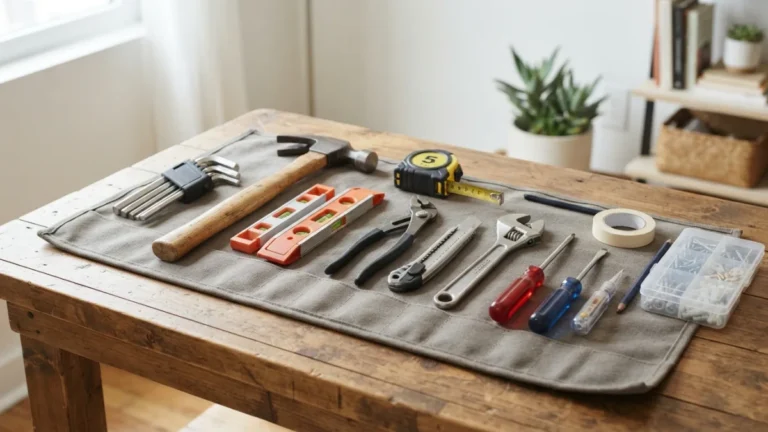
You don’t need a workshop to adjust cabinet hinges. A hand screwdriver that fits the screw heads, usually a Phillips head, is better than a power drill, because a drill can strip screws or crack the hinge in seconds. A few cheap extras make the job smoother and help you avoid undoing your own progress. Gather these items before you open the first door:
- A hand screwdriver that fits snugly in the screw heads
- Wooden toothpicks and wood glue for stripped screw holes
- Painter’s tape and a pencil to mark where things started
- A business card or folded paper to measure gaps
- A small level to check that door edges run straight
- A helper or a small stack of books to support heavy doors
How to Adjust Cabinet Hinges in 5 Easy Steps
Work through the steps in order, because each one affects the next. Adjust one hinge at a time, turn screws in small increments of about a quarter turn, and close the door after each change to see what happened. Small moves go a long way, since a single turn can shift a door by a visible amount. If you can find a brand name stamped on the hinge arm, check that manufacturer’s site, such as Blum, for guidance on that exact model. Hinge designs vary, and the maker’s instructions beat any general advice, including ours.
Step 1: Tighten Loose Hinge Screws
Start by checking whether you need to tighten loose hinge screws, because a wobbly screw can undo every other adjustment. Open the door and test each hinge by gently wiggling the door. Check two places: the screws holding the cup in the door, and the screws holding the mounting plate to the cabinet side. Snug each one with your hand screwdriver, but stop when it feels firm. Particleboard and soft wood strip easily. If a screw just spins and never grips, the hole is stripped. Dip a few toothpicks in wood glue, push them into the hole, snap them off flush, and let the glue dry. Then drive the screw back in. Sometimes that alone straightens the door, so test it before moving on.
Step 2: Learn What Your Euro Hinge Screws Do
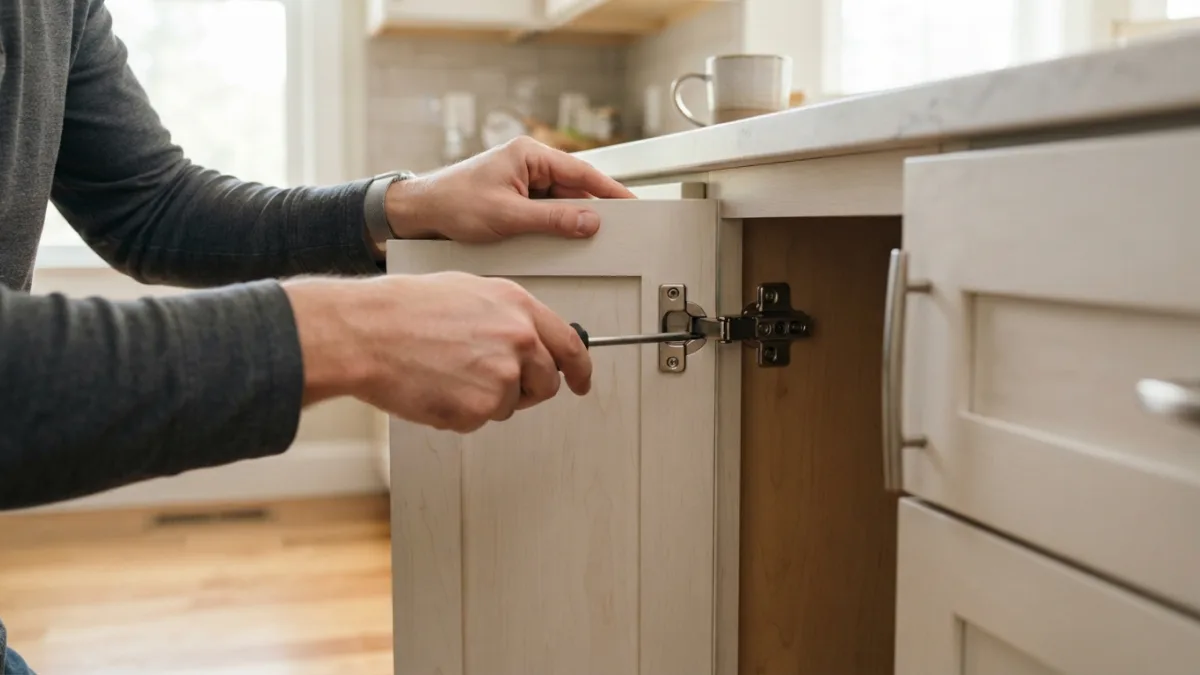
Concealed hinges usually have two or three adjustment screws on the arm, and these euro hinge screws each move the door in a different direction. One screw typically moves the door left or right. Another moves it toward or away from the cabinet, which is called depth. Height is often handled at the mounting plate rather than the arm. Layouts differ between brands, so don’t trust memory or guesswork. Give one screw a quarter turn, watch how the door shifts, and reverse it if it goes the wrong way. A pencil mark or a strip of painter’s tape on the frame helps you see small changes. Once you know which screw does what, you can adjust cabinet hinges on every door in the room with confidence. This connects closely with another common issue — see Find a Wall Stud: 7 Easy Tricks Without a Stud Finder for more on that.
Step 3: Fix Sagging Cabinet Door Height With the Mounting Plate
A door that droops at its outer corner usually needs a height correction. Ask your helper to hold the door level, or prop it with a few books. Loosen the mounting plate screws on the cabinet side just enough that the door can slide up or down, raise it until the bottom edge lines up with its neighbor, then retighten. Some plates have a small height screw or slot, so look for that before loosening anything. Check the door against a level or the edge of the cabinet next to it. Very tall or heavy doors sometimes sag again because the hinges carry too much weight. In that case, check the manufacturer’s guidance on adding a third hinge. A door that keeps drooping often points to stripped screw holes, so recheck Step 1.
Step 4: Close Uneven Cabinet Door Gaps
Uneven cabinet door gaps are the flaw people notice first, especially where two doors meet. Close the doors and look at the gap from top to bottom. If it is wider at the top, adjust the side-to-side screw on the top hinge only. If it is wider at the bottom, adjust the bottom hinge. Use a business card or folded paper as a simple gauge so each gap matches. Adjust the side screws on both hinges until the space looks even, then check the depth screws so the door face sits flush with its neighbor. Make tiny moves and recheck often. If a door tilts like a parallelogram, the top and bottom hinges are likely pulling in opposite directions, so adjust them in small, equal steps.
Step 5: Finish With Soft Close Hinge Adjustment
If your cabinets close quietly, finish with soft close hinge adjustment. Many of these hinges have a built-in damper, and some include a small dial, switch, or screw that changes how quickly the door settles. Others use a separate damper clipped to the hinge arm or mounted on the frame. If the door slams, or stops just short of the latch, the damper may be set too firm or too loose. The right setting depends on the model, so look for markings on the hinge or check the maker’s instructions. Never force a damper by hand. After any change, open and close the door a few times, and notice whether it pulls itself shut smoothly from a few inches away.
Cabinet Door Not Closing? Check These Causes
When a cabinet door is not closing, the cause is rarely a broken hinge. More often, the door is catching on the frame because the side or depth screws are set too tight. Run through this short list before you replace anything: You might also find our article on Fix a Dripping Faucet: 7 Easy Steps for Beginners Today helpful here.
- Loose screws let the door shift and rub, so go back to Step 1.
- Swollen wood from humidity can make a door too big for its opening.
- A blocked path from shelf items, pot lids, or an open drawer can stop the door.
- A bent hinge arm from years of slamming may no longer line up.
- A misplaced catch or magnet can hold the door slightly ajar.
If a hinge is bent, cracked, or rusty, or if the screws have no adjustment left, replacing it is a quick, inexpensive fix. Take the old hinge with you so you can match its size and style.
Final Check for Cabinet Door Alignment
Good cabinet door alignment comes down to three things: even gaps, flush faces, and clean lines across the row. Step back a few feet and look along the doors, because mistakes are easier to spot from a distance. Hold a level or straightedge across the tops of a row of doors and see whether they line up. Open and close each door five or six times to make sure it doesn’t touch the frame or its neighbor. Then wait a day or two and look again, since freshly tightened hardware can settle slightly. If your home has big seasonal humidity swings, expect to touch up a few doors once or twice a year. Keep your screwdriver handy, and the job takes only a minute.
Final Thoughts
Crooked doors look like a big repair job, but they usually come down to a few loose or misadjusted screws. Tighten first, learn what each screw does, correct the height, balance the gaps, and finish with the soft-close setting. Go slowly, work in quarter turns, and check your progress as you go. If you ever feel stuck, the manufacturer’s instructions for your hinge model will settle most questions. When you adjust cabinet hinges regularly, small problems stay small, and your doors keep closing evenly for years. The next time one starts to lean, you’ll know exactly where to start.
FAQ
Can I adjust cabinet hinges without removing the door?
Yes. With concealed hinges, you can make all the adjustments while the door stays on the cabinet. Just support heavy doors while you loosen the mounting plate screws. For a related walkthrough, check out Fix a Running Toilet: 5 Easy Causes and Simple Repairs.
Which way should I turn the adjustment screws?
It depends on the hinge brand and the screw. Turn one screw a quarter turn, watch how the door moves, and reverse it if needed.
Why does my cabinet door keep drooping after I fix it?
Stripped screw holes are a common cause, since the screws can’t hold. A heavy or tall door can also overload the hinges. Repair the holes with toothpicks and glue, and check the manufacturer’s advice on extra hinges.
When should I replace a hinge instead of adjusting it?
Replace it if the arm is bent, the metal is cracked or badly rusted, or the screws have run out of adjustment range. Bring the old hinge to match the size and style.
Can I change how fast a soft-close door shuts?
On many models, yes. Look for a small dial, switch, or screw on the hinge or damper, and follow the maker’s instructions. Some dampers have no adjustment at all.

Ghani Mejber — Founder & Lead Editor
Ghani Mejber is the founder of DIY Homes Hub. After years of living in compact rentals with strict lease rules and limited storage, I started sharing practical, damage-free home upgrades and basic repair guides built for real budgets. Every project I publish focuses on simple tools, accessible materials, and reversible solutions that protect your security deposit.