Command Strip Hacks: 7 Easy Tips Every Renter Should Try
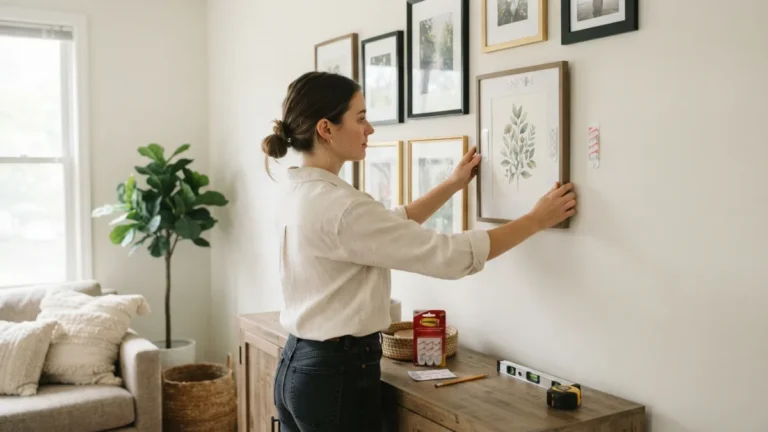
Nothing ruins a rental deposit faster than a wall full of nail holes, and that’s exactly why command strip hacks have become the secret weapon of apartment dwellers everywhere. Whether you’re hanging a gallery wall, mounting a mirror, or just trying to keep your keys off the kitchen counter, these little adhesive strips let you decorate without ever touching a drill. If you’ve only ever used them the basic way, you’re missing out on some clever tricks that can save you money, time, and a very awkward conversation with your landlord.
Renting comes with a long list of restrictions, and most leases are strict about what you can and can’t do to the walls. Drilling holes, painting without permission, or leaving visible damage can cost you part of your security deposit when you move out. That’s why so many renters have turned to renter-friendly housing resources for guidance on what’s actually allowed in a rental unit. Command strips and other removable adhesive strips offer a simple workaround, letting you personalize your space while keeping the walls in the same condition you found them. If you want to dig deeper, our guide on Removable Wallpaper: 7 Easy Steps to Avoid Mistakes covers this in more detail.
Why Command Strip Hacks Are a Renter’s Best Friend
The beauty of command strip hacks lies in how versatile they are. These strips aren’t just for hanging a single picture frame anymore. People use them to mount shelves, organize cords, hang curtains, and even secure rugs to hardwood floors. Because they’re designed to come off cleanly without peeling paint or leaving sticky residue, they solve one of the biggest headaches of apartment living: how to make a space feel like home without risking your deposit. Once you understand a few tricks for using them correctly, you’ll find dozens of new ways to decorate and organize every room.
Choosing the Right Type of Command Strip for the Job
Not all adhesive strips are created equal, and using the wrong one is one of the most common mistakes renters make. Command strips come in different sizes and weight capacities, and choosing the correct one matters just as much as how you apply it. A strip rated for two pounds won’t hold a heavy mirror, no matter how carefully you press it onto the wall. Before you buy, check the packaging for the recommended weight limit and surface type, since some strips work better on painted drywall while others are designed for tile, wood, or even outdoor use.
| Strip Type | Best For | Typical Weight Limit |
|---|---|---|
| Small strips | Light frames, small decor items | Up to 1 lb |
| Medium strips | Mirrors, wall art, calendars | Up to 3 lbs |
| Large strips | Shelves, larger frames | Up to 7.5 lbs |
| Outdoor strips | Patio decor, weather-exposed items | Up to 5 lbs |
| Picture hanging strips | Frames without nails or hooks | Up to 16 lbs (paired sets) |
7 Command Strip Hacks Every Renter Should Try
1. Match the Strip to the Weight of Your Item
This sounds obvious, but it’s the number one reason strips fail. Weigh your item before you shop, or at least estimate it honestly. If you’re hanging something heavier than a single frame, use multiple strips spread across the back of the object instead of relying on just one. Distributing the weight evenly reduces the chance of the strip peeling away over time, especially in warmer rooms where heat can soften the adhesive slightly. When in doubt, size up rather than down, since a slightly oversized strip is far less risky than one that’s too weak for the job.
2. Prep the Wall Surface Like a Pro
Adhesive only works as well as the surface it’s stuck to. Wipe down the wall with rubbing alcohol before applying any strip, since dust, grease, and even leftover cleaning product residue can weaken the bond significantly. Let the wall dry completely before sticking anything to it. This step takes less than a minute but makes a huge difference in how long your damage-free hanging solutions actually last. Skipping it is one of the most common reasons people complain that Command strips “don’t work,” when really the problem was a dirty or damp surface. This connects closely with another common issue — see Basic Tool Kit Every Renter Should Own for more on that.
3. Use the Push-and-Hold Trick for Maximum Grip
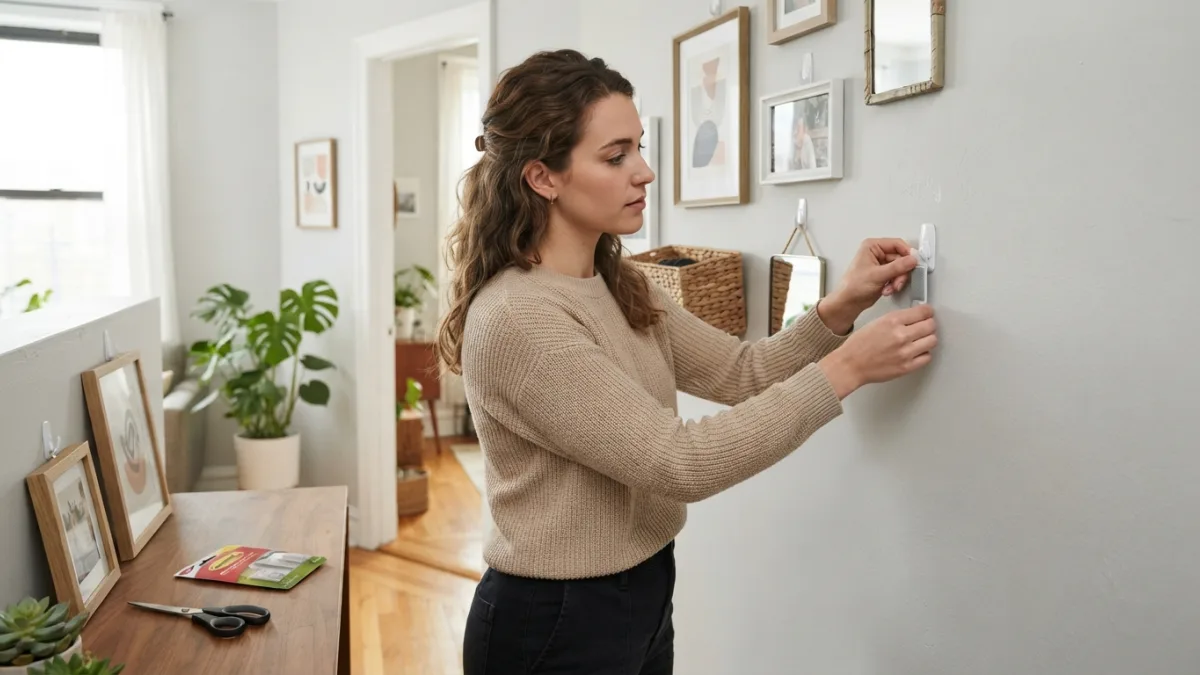
Once you’ve pressed the strip onto the wall, don’t just let go and walk away. Hold it firmly in place for about 30 seconds, applying steady pressure across the entire strip. Then wait at least an hour, ideally longer, before hanging your item. This waiting period allows the adhesive to fully bond with the wall surface, and it’s one of the simplest command strip hacks that people skip because they’re in a hurry. Patience here really does pay off, especially for heavier items like mirrors or small shelves.
4. Master the Slow-Pull Removal Method
When it’s time to take something down, resist the urge to yank the strip off quickly. Instead, pull the tab slowly and steadily downward, parallel to the wall, rather than pulling it straight out. This stretching motion releases the adhesive gradually without damaging the paint underneath. If you don’t have the removal tab or it breaks off, dental floss or fishing line can be worked behind the strip as a backup method. According to Command’s product design, the stretch-release technology is specifically engineered for this slow, controlled removal.
5. Get Creative with No-Drill Wall Hooks
No-drill wall hooks paired with strong adhesive strips can replace almost anything you’d normally screw into a wall. Use them to hang coats near the entryway, organize scarves in a closet, or mount a small basket for mail and keys. Some renters even use hook-and-strip combinations to create a makeshift pegboard for kitchen utensils or craft supplies. Because these hooks come in dozens of styles, you can match your décor while still keeping everything fully removable when your lease ends.
6. Organize Small Spaces Without a Single Nail
Small apartments benefit enormously from vertical organization, and strips make that possible without any permanent changes. Stick removable strips inside cabinet doors to hold spray bottles or cleaning supplies. Use them under a bathroom sink to hang a small caddy, or behind a bedroom door to hold an over-the-door organizer without extra hardware. These apartment decorating tips work especially well in studio apartments, where every inch of wall space needs to earn its keep. You might also find our article on 10 Renter-Friendly Upgrades That Won't Cost Your Deposit helpful here.
7. Reposition and Reuse Strips the Right Way
A common myth is that Command strips are one-and-done, but many types can actually be reused if you’re gentle with them. After removing a strip cleanly using the slow-pull method, check if the adhesive surface still looks smooth and undamaged. If it does, you may be able to press it onto a fresh surface, though it’s smart to test its hold with a lighter item first. For anything important or heavy, it’s still safer to use a brand-new strip rather than risk a fall.
Extra Tips to Make Your Command Strip Hacks Last Longer
A few small habits can extend the life of every strip you use around your apartment. Avoid placing strips in areas with constant humidity, like directly above a shower, since moisture weakens the adhesive over time. Keep an eye on temperature too, since extreme heat or cold can affect how well strips hold. Here are a few quick reminders that make a real difference:
- Always check the maximum weight rating before buying
- Clean the wall surface with alcohol, not just a damp cloth
- Wait a full hour after applying a strip before hanging anything
- Store extra strips in a cool, dry place so the adhesive doesn’t degrade
- Replace strips that look stretched, cracked, or discolored
Final Thoughts
Decorating a rental doesn’t have to mean choosing between a bare, impersonal space and risking your security deposit. With the right removable adhesive strips and a little patience, you can hang art, organize your closet, and personalize nearly every room without touching a hammer or drill. These command strip hacks are simple enough for anyone to try, yet they make a real difference in how a rental feels day to day. Once you get the hang of prepping surfaces, choosing the right strength, and removing strips properly, you’ll wonder why you ever considered nails in the first place.
Frequently Asked Questions
Do Command strips really not damage walls?
When used correctly and removed with the slow-pull method, they typically don’t damage painted drywall. Problems usually happen when strips are yanked off quickly or used on surfaces they’re not designed for, like textured or unpainted walls. For a related walkthrough, check out Peel and Stick Backsplash: 5 Easy Before-and-After Tips.
How much weight can Command strips hold?
It depends on the strip size, ranging from about one pound for small strips up to sixteen pounds for heavy-duty picture hanging strips used in pairs. Always check the packaging for the exact rating before hanging anything.
Can I use Command strips on textured or wallpapered walls?
They generally don’t hold well on heavily textured surfaces or delicate wallpaper, since the adhesive needs full, smooth contact to bond properly. In these cases, it’s safer to test a strip on a hidden spot first.
How long should I wait before hanging something on a new strip?
Most manufacturers recommend waiting at least one hour after application, though waiting longer, especially overnight for heavier items, gives the adhesive more time to fully set.
Can Command strips be reused after removal?
Sometimes, if the strip was removed carefully and the adhesive surface still looks clean and undamaged. For anything valuable or heavy, though, it’s better to use a fresh strip rather than risk a weaker hold.

Ghani Mejber — Founder & Lead Editor
Ghani Mejber is the founder of DIY Homes Hub. After years of living in compact rentals with strict lease rules and limited storage, I started sharing practical, damage-free home upgrades and basic repair guides built for real budgets. Every project I publish focuses on simple tools, accessible materials, and reversible solutions that protect your security deposit.